by Paula D.
on June 19, 2026 7:45 am in Food
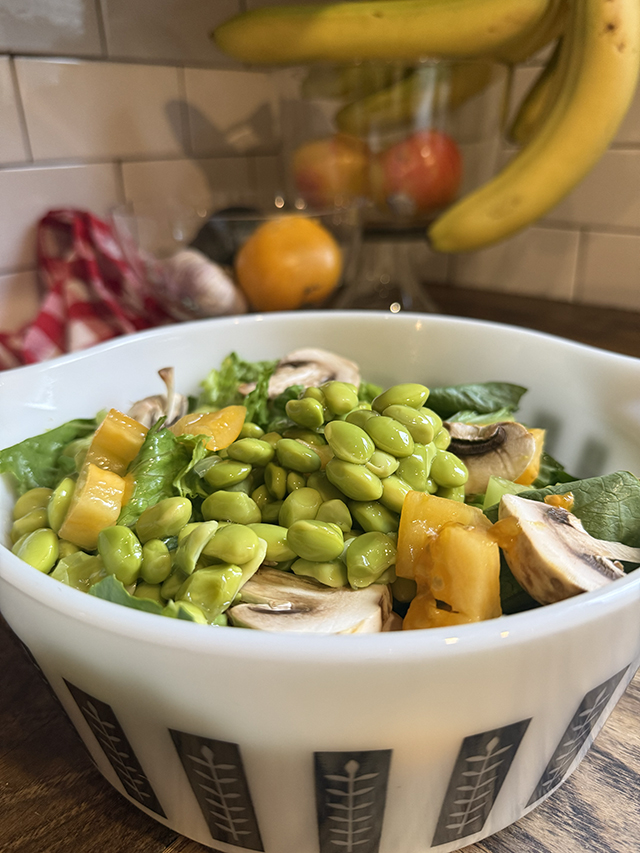
My first experience with edamame was at a Japanese restaurant ages ago. Where, I don’t remember. A bowl arrived at the table, steaming hot and sprinkled with coarse salt. I remember being instructed to pop the little green beans out of the pods. They were delicious and simple. What I didn’t know at the time was that edamame are young soybeans.
Edamame has been enjoyed for centuries. The earliest written reference dates to 1275 Japan, when a Buddhist monk thanked a parishioner for a gift of the young green soybeans.
For years, tofu has been my go-to plant-based protein. Then I tried a bunch of other products – veggie hotdogs and sausages, Beyond Burgers, and the fake chicken nuggets. The processed stuff they say isn’t good for you, so I mostly eat tofu these days. Anyone who cooks with it regularly knows the drill: drain it, press it with a can of tomatoes, wait, more paper towels, drain again, season it, and then finally cook it and hope it doesn’t stick to the pan.
In my head, buying the container of edamame at Key Food was a special treat, and I convinced myself that edamame was expensive. Then one day, I actually looked at the price and realized the cost was about the same as many of the veg-protein things I was already buying. It was one of those lime neon-green light bulb moments.
Now I’ve been buying Edamame on the regs, and putting the beans in my salads. They are so satisfying. Edamame has a hearty, meaty, creamy texture that makes for a substantial meal. The flavor is mild and a little sweet, use salt! A handful of edamame in a big bowl of salad can hold me over all afternoon. And I dress the salads differently, so I have variety.
Note: Trader Joe’s sells long-lasting, shrink-wrapped Edamame that’s cheaper than most supermarkets.
Also, I just want to say that bright lime green makes me happy. The beans look fresh, healthy, and alive, just how I want to be. And the bright color translates great in my Instagram photos. Silly, I know, yet important to me.
I did a little reading on edamame after learning they are cute, young soybeans, and learned they’re packed with nutrition. They’re one of the few plant foods considered a complete protein, meaning they contain nine essential amino acids our bodies need. A one-cup serving provides about 18 grams of protein along with fiber, iron, folate, and many vitamins and minerals. The combination of protein and fiber helps keep you feeling full, making edamame a fantastic food for energy and health.
The Beach 91st Street Community Garden has teamed up with Rockaway Art Room for drawing meet-ups at the garden!
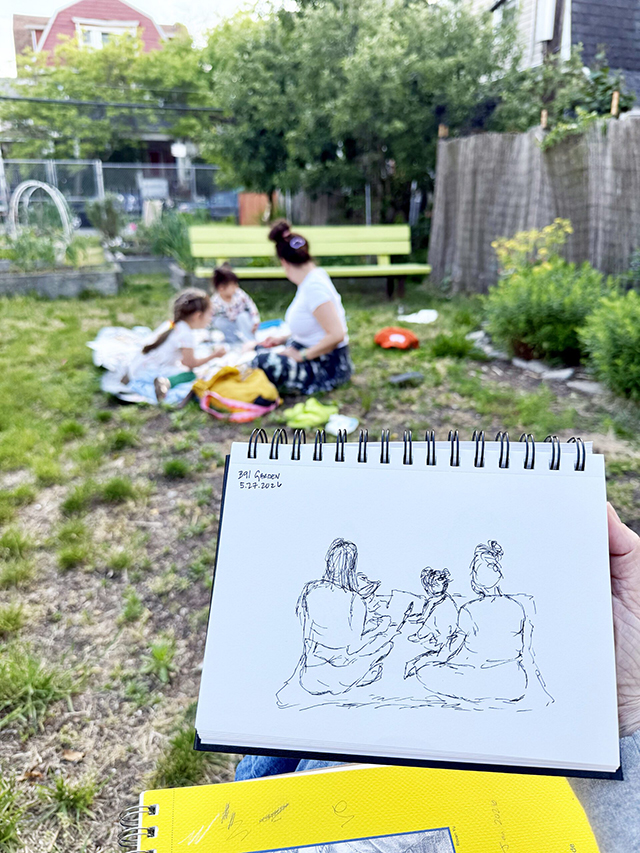
I can’t explain how wonderful it felt to spend an hour and a half outside on a beautiful evening, sitting with a mix of conversation and concentration. People were scattered around the picnic table under the pergola, where the wisteria had finally taken off! Garden members, friends, and their little ones stretched out on a blanket, drawing the plants that surrounded them. My neighbor Anne created lovely black and white pen sketches of those folks on the blanket! Everyone draws whatever inspires them in nature.
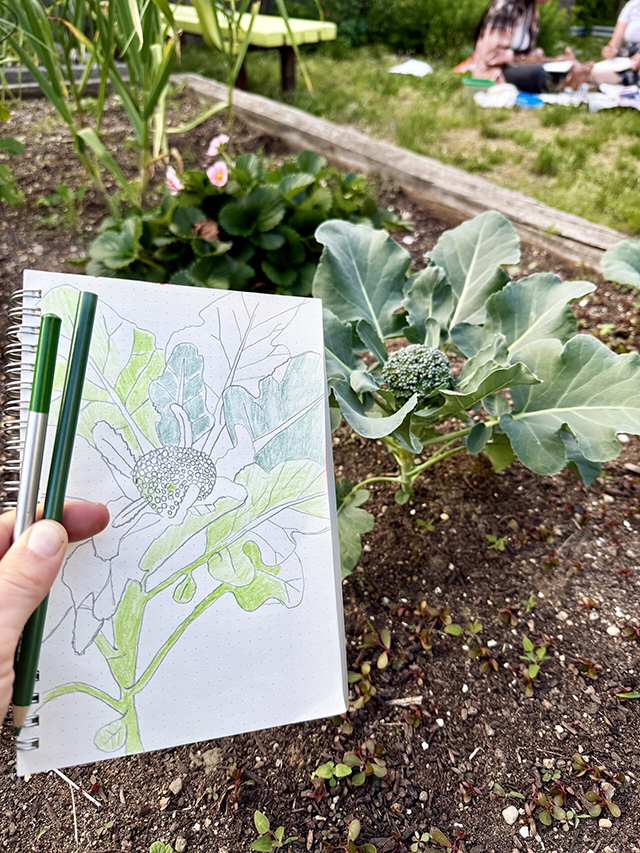
I found myself interested in a funny little broccoli plant. Looking at the baby broccoli in such detail allowed me to slow down and focus on what was right in front of me. A therapeutic exercise after a busy work day. The tiny beads that make up the broccoli head are so intricate. To me, the head of broccoli looked like a galaxy of mini cabbages that became clustered stars. As my eye moved from broccoli to my lap, where I rested my sketchbook, I noticed the lined patterns on the leaves mirrored the veins beneath the skin on my wrist. “Everything is connected.”
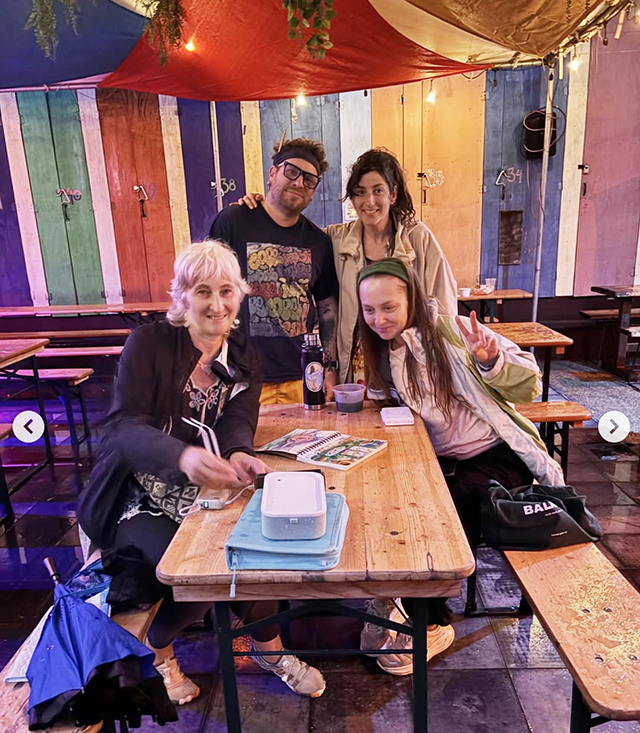
At the garden’s first drawing meet-up, there was a chance of rain, and the rain came. We all hustled over to the Surf Club for cover and continued drawing, eating tacos, and hanging out. Each Drawing Meet-Up is held every Wednesday from 6-7:30 pm throughout the summer. Drawing materials are supplied, and you can bring your own too. The last meet-up was at the Sangwich shop Panino Bozza (Beach 96 & Shore Front Parkway). Food drawing!
The Beach 91 Community Garden will co-host more meet-ups at the garden. Please join us. We’re building a cute little crew of community members who enjoy art, fresh air, and spending time together. No art skills are required. Just come and put some marks on paper. It feels so good.
If you haven’t heard about Rockaway Art Room yet, it’s a wonderful grassroots project creating opportunities for people to make art, connect with one another, and explore creativity in our community.
I saw in the Rockaway Art Room’s newsletter that founder Jamie Soltis is launching a new initiative that expands the org’s community arts programming into theater. Starting June 8th and continuing on the second Monday of each month, the Rockaway Rehearsal Room will be a free gathering where actors, playwrights, directors, and the curious can come together to play, practice, collaborate, and make new work. This creative “gym” will be held at The Jupiter Club in Arverne.
For more information about art classes, drawing meet-ups, and the rehearsal room, visit jamiesoltis.com/rockawayartroom and follow on instagram @rockawayartroom
For a long while, I’ve been annoyed that my backyard is shaded. The condo on 91st and Shorefront blocks almost all the sun. So much space to garden back there, but what can I really do with almost all shade?
Around 9 or 10 years old, when you begin to realize that. How your body looks in the world matters (unfortunately). I noticed the size of my nose. It was so big. And I was so small and pale, and I had freckles, of course, only on my nose. The whole situation was alarming to me. I was upset about my nose, and I remember my father telling me once, with a smile, “Don’t worry, Paula, your face will grow into your nose. God knows what he is doing.”
He didn’t deny that my nose was huge for my head, and what he was telling me, in his wonderful way, was — you have to work with what the universe gives you, and have trust. And I will add, be grateful for what you are given, small or big.
My father was right, my face did grow into my nose! It’s still big, but it works. It’s me.
I’ve also grown as a gardener. I learned over the years what plants work in shade, and only recently have I embraced the joy of being in a leafy-covered space. The ease of not squinting, and the sound of leaves in the ocean breeze all around me. It’s a peaceful feeling. A shady garden is a beautiful environment filled with life. Many birds. There is moss and lichen. Snails show their spiral outfits early in the morning as they glide by dew drops. There is texture and leafy color, and the scent of the earth with a pinch of salt in my backyard forest.
A shady garden gets fewer than four hours of direct sunlight each day.
Instead of sulking over what I don’t have, I’ve stepped up to the shade challenge. I’m working with what God has given me. If everything were easy, life would be boring. You wouldn’t feel the happiness and reward of achieving challenging goals.
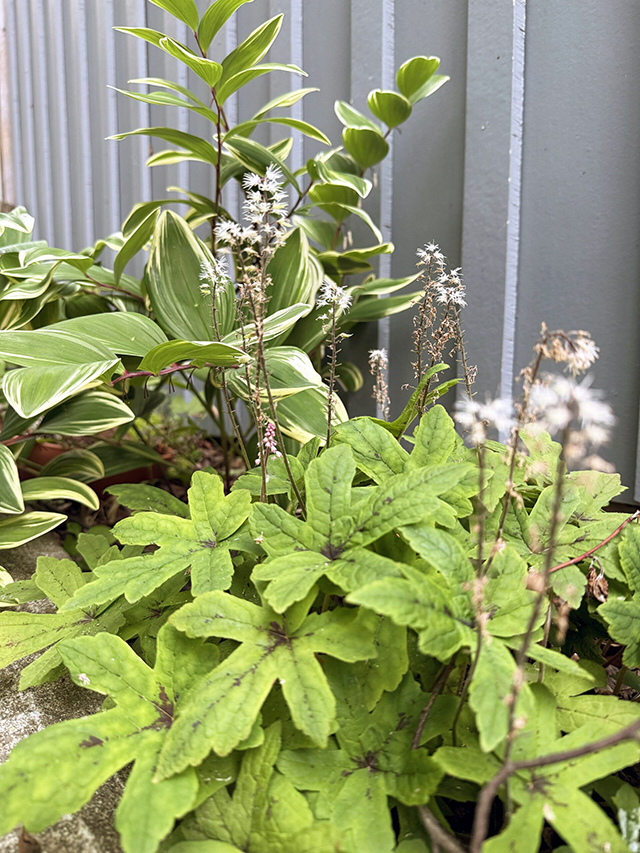
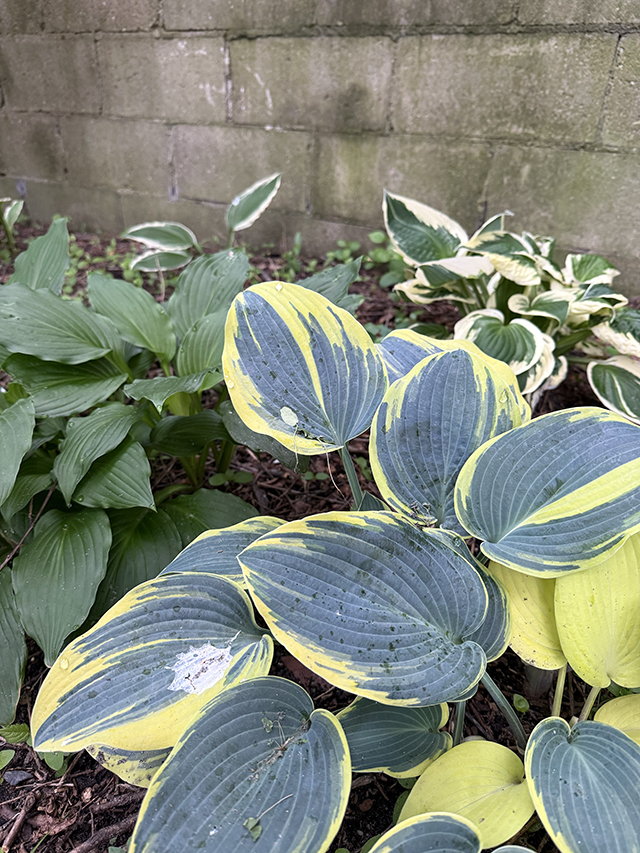
I began with the basic plants I knew could live in the shade — Hostas and Ferns. This is something I learned from my father’s garden at my childhood home. When I moved into my Rockaway house over 10 years ago, hostas were already in the ground. I replanted them, divided them, and let them spread.
I tried ferns too, but they didn’t do so well. They needed more watering than my time allowed, so those faded out.
A community garden member introduced me to Solomon’s Seal — a beautiful, strange tuber with variegated leaves and dangling bell-like white baby flowers. I was offered some, and those started to spread. Suddenly, I had two plants that were really working.
I bought a few more unusual and interesting varieties of hostas to add to the collection. Blue Hostas and First Frost Hosta are favorites now. Aqua blue leaves and those little, light purple flowers I remember from childhood, they shoot up in late June through August.
A few years ago, I discovered Coral Bells. This perennial is easy, colorful and shade-loving, native to North America. I love them for their bright foliage — deep purples, lime greens, oranges, and even almost black tones. They have tiny dusty flowers that pop up in June.
All of the above-mentioned do well in shade or partial shade in many soil types with good drainage. Half of mine are rooted in a mix of sand with a couple of bags of compost I plop on top each spring. All are perennial and can be divided each year to propagate.
This season, I’m exploring more shade flowering plants. On my list: Bleeding Heart, Woodland phlox, and Astilbes – bloom late spring to early summer. False Spirea and Yellow Corydalis (blooms mid-summer), Black Cohosh, White Turtlehead, and Closed Gentian show their flare in late summer.
If you have been given a shade garden, work with it. Our garden spaces and our noses, small or big, are a blessing!
Follow me hands-in-the-soil summer on Instagram – @theglorifiedtomato.
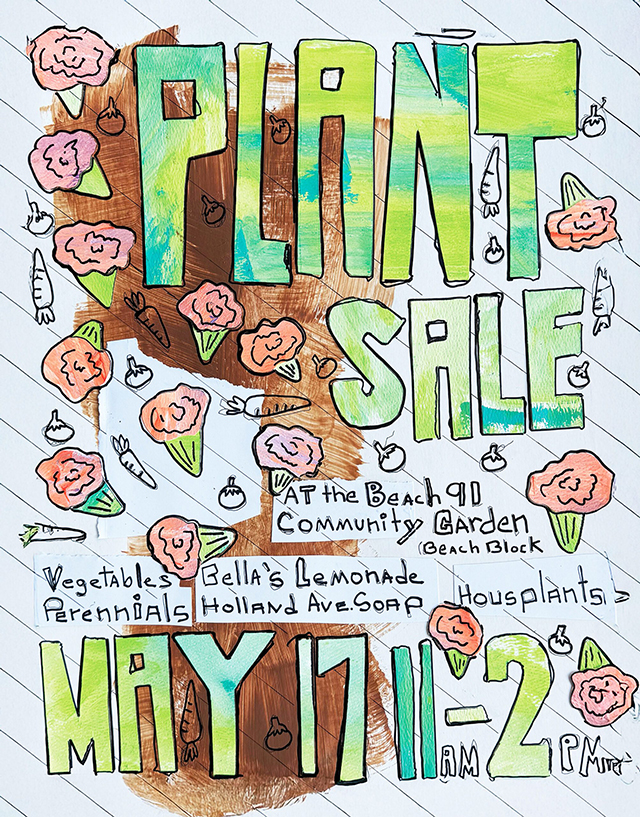
Join the Beach 91st Street Community Garden crew for our annual plant sale this Sunday, May 17, from 11 a.m.-2 p.m. Please say a while! The weather looks perfect. Bring snacks or a full feast picnic and spend a fun, relaxed afternoon in the garden. There will be garden books to inspire your spring planting. We’ll have paper and colored pencils for the kids to draw flowers. Bring a camera and take some photographs of the growing garden. A guitar will be present! And there will be plants for sale.
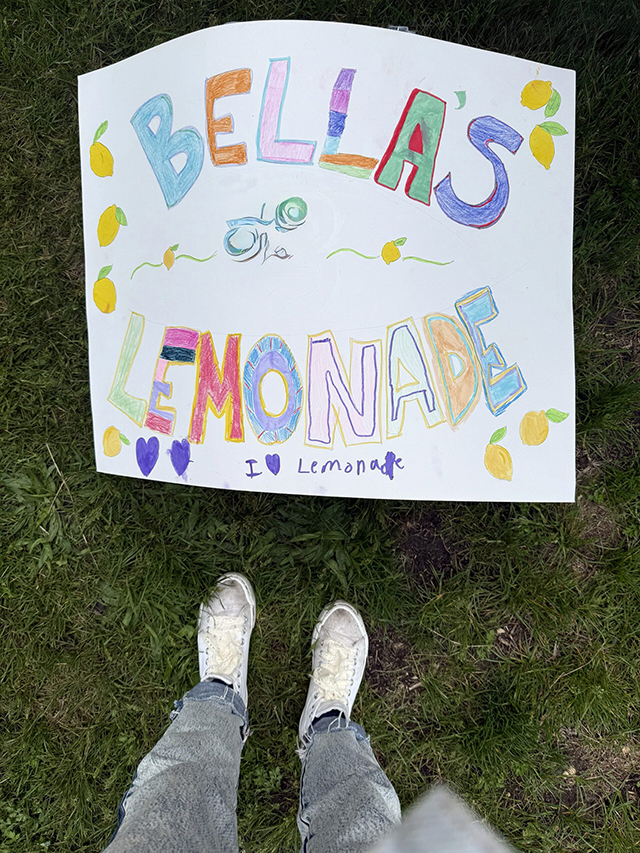
Proceeds from Bellas’ Lemonade Stand will go to the dance company at Waterside School – 140 Beach 112 St, Rockaway Park.
Expect herbs and your go-to vegetable starters. We’ll also have salt-tolerant perennials like pink echinacea, yellow daylilies, and purple walker’s low (for your garden, teas, and cats). You’ll find the late-blooming autumn joy succulent with soft burgundy flowers, along with marigolds — pictured on the poster. They’re not ice cream cones, FYI… though, they can be anything you want them to be! Plus, expect other year-round color choices to brighten your garden. Some houseplants, too!
The plants are generously donated by garden members and by NYC Parks GreenThumb.
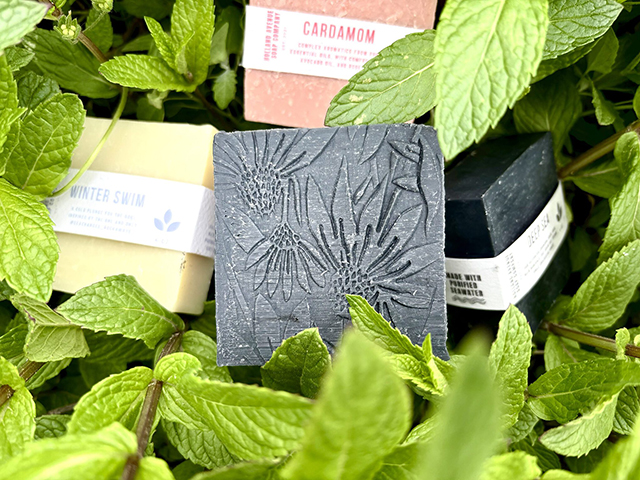
The Deep Sea bar soaps are infused with rosemary and mint grown at the Beach 91st Street Community Garden.
Holland Avenue Soap Co. will be joining us with a selection of handcrafted olive oil bar soaps, blends are made with purified seawater, and others are infused with herbs grown right here at the Beach 91st Street Community Garden. These offerings are thoughtfully crafted locally by garden member Mike Benigno. Check out the IG – @hollandavesoapco.
Bella’s back with lemonade! Our garden friend and young entrepreneur will be serving fresh, tart lemonade and her best seller, unicorn pee! A taste of sunshine, sugar, and springtime feels for a lovely day in the garden. All proceeds from Bellas’Lemonade Stand will go to the dance company at Waterside School, where she performs. This year, the program almost shut down due to funding, so let’s buy some lemonade!
The garden plant sale and hangout is an opportunity to meet your neighbors, catch up with friends, and enjoy Rockaway nature by the sea.
Proceeds from the fundraiser help support improvements to the garden, along with our community events throughout the year. The Beach 91st Street Community Garden is thankful for the ongoing support of our neighbors and the Rockaway community!
And look out for our upcoming drawing meet-ups co-hosted with @rockawayartroom.


