
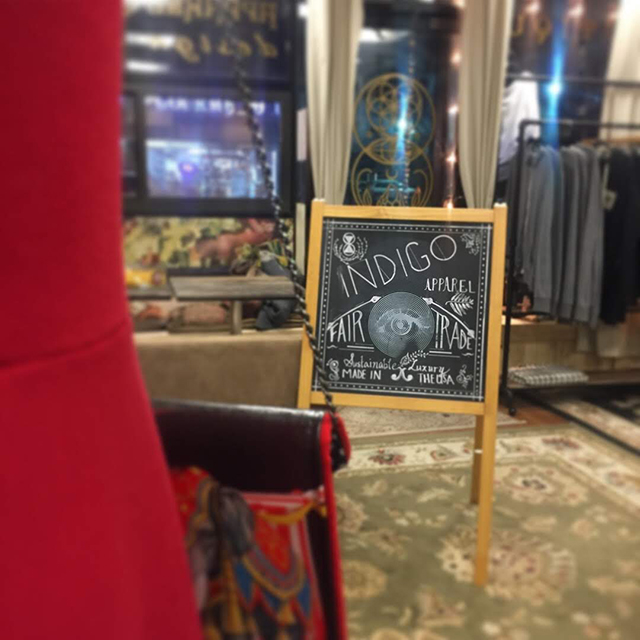
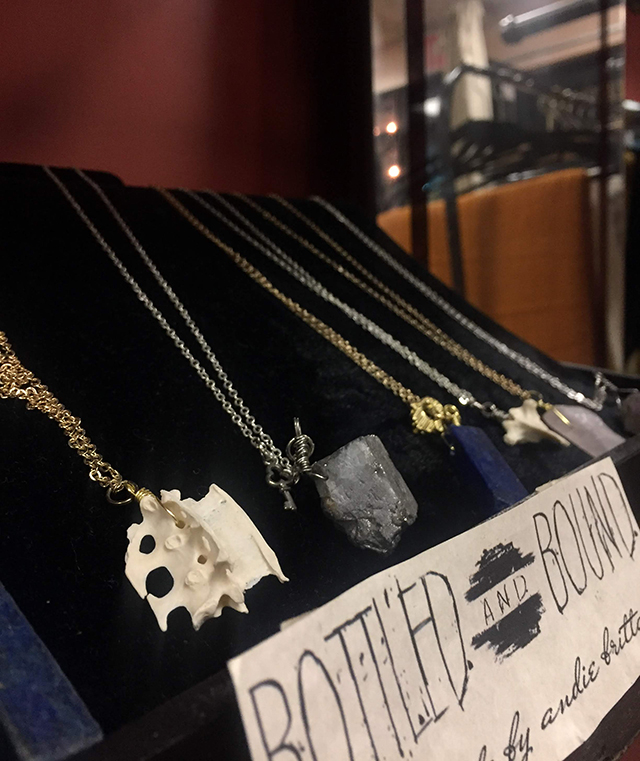
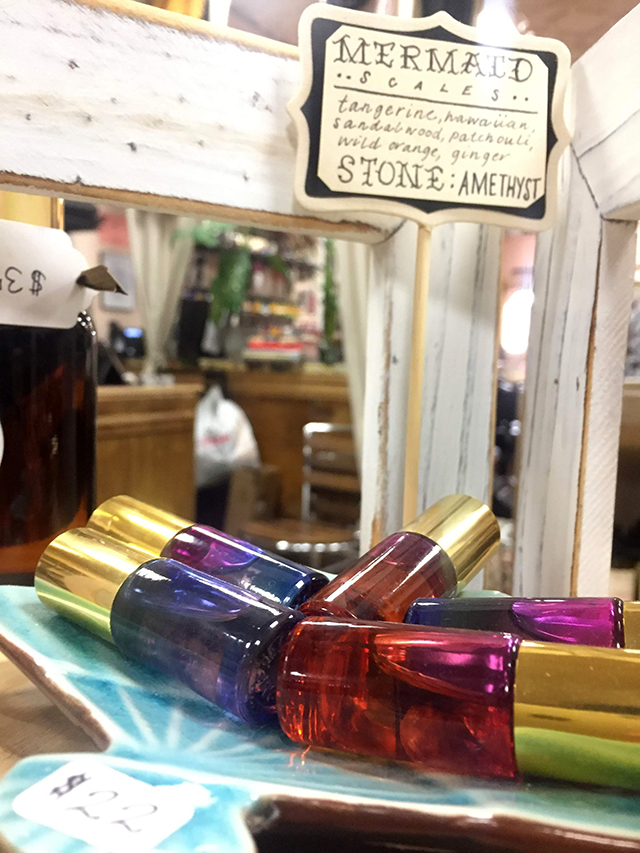
A month ago, my friend Jodi and I went to the Rock-a-Block Blvd. Street festival hosted by the Rockaway Business Alliance. This event is great because it gives you an opportunity to chat with neighbors, meet business owners and stroll into stores you don’t normally visit. Since The Studio Phantasmagoria opened last spring, I’ve been curious to check it out. “What’s going on in there? Let’s go in!” I said to Jodi. It felt whimsical, fresh and inspiring as we stepped through the doorway. I saw delicately dyed clothing, thoughtfully displayed handmade jewelry and soft crocheted hats, among other specialty items for purchase. Glancing beyond, I noticed an eclectic workshop. Threads of every color hanging from the wall; fabrics ready to be cut on the counter and the sewing machine was powered up to my right. To the left, there’s artwork tacked on the wall; figurines of cats, Buddha, elephants, a bottle of Jack Daniels and a rainbow of inks for tattooing.
Jackii Ramis, co-owner of The Studio Phantasmagoria greeted Jodi and I with a spunky smile. Jackii, from neighboring Long Beach, is a fashion designer with a focus on sustainable design and custom work. Indigo Apparel is her eco-friendly activewear brand which explores organic and recycled fabrics, low impact dying, and screen printing. Ramis’s business partner, Taryn Elise runs Tattoos by Taryn Ellis. She is heavily influenced by ornamental and neo-traditional tattooing, as well as patterning and custom lettering. Both artists craft their works out of The Studio Phantasmagoria.
Along with creating and selling their works and items made by other artists in the store front, the women host events and classes. Jackii mentioned she was teaching a beginners sewing class in November. I had taken a sewing class years ago which I enjoyed very much, but since then, my machine has been collecting dust. Signing up for Jackii’s class was the perfect incentive to get back at it. Both Jodi and I committed to the class! I’ll be reporting on my progress and experience working with Jackii at the The Studio Phantasmagoria in the upcoming weeks.
In recent years, Rockaway has earned a reputation as a place were women entrepreneurs prosper, engage the community and add value to the economic development of the peninsula. Co-owners Jackii Ramis and Taryn Elise of The Studio Phantasmagoria are proving to live up to this standard.
Get inspired by following @studio.phantasmagoria on instagram. To Learn about the creative classes offered at the Studio like figure drawing or the next sewing class, visit their Facebook page: facebook.com/studio.phantasmagoria/. The Studio Phantasmagoria is located at 92-10 Rockaway Beach Blvd. You’ll be sure to find great holiday gifts inside, so pop in and support this unique local business!

Thanksgiving is one of those holidays we all love: it’s all about sharing with one another and remembering all that we are thankful for. And food.
If you’re unsure what to make for your vegetarian guests this Thanksgiving or you’re interested in trying something unconventional this year, I have the recipe for you! This autumn-inspired taco is delicious, beautiful in color and you can prepare it in advance. And who doesn’t love a taco station!
There are several steps for each component which I will outline for you. It seems like a lot but it’s actually pretty simple. Prep time is about an hour and half.
Ingredients (serves 8):
Small corn tortillas
2 butternut squashes
4 red onions
2 bulbs garlic
3 red bell peppers
1, 16 oz ricotta cheese, whole milk
Olive oil
2 tablespoons of butter
2 tablespoons cumin
Salt and pepper
½ cup parsley
Directions:
For the squash: Preheat the oven to 400 degrees. Cut the butternut squash in half, long ways. Use a sharp knife. Coat all sides of the squash with olive oil. Place the open side up on the baking sheet. Chop the garlic and place it on top – use a lot! Add salt and pepper. Roast for 25 minutes or until soft. Scoop out once it has cooled.
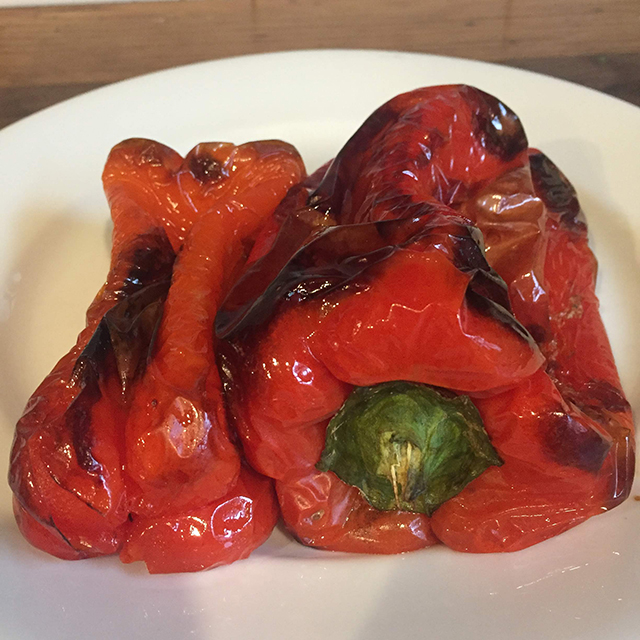
For the peppers: Preheat the oven to 400 degrees, you can roast the peppers at the same time as the squash if you have room. Poke a hole in each pepper, coat the peppers with olive oil. Roast in the oven, periodically turning them for about 30 min. until soft and the skin gets slightly blackened. Let them cool for 10 min. Peel the skin off and cut the pepper into thin strips. Save the juice for marinating.
For the onions: Chop the onions, chop the garlic, about 4 cloves. On the stove top sauteed both ingredients in 2 tablespoons of butter on low. Once caramelized, add salt, pepper and two tablespoons of cumin.
When you’re ready to serve, place all ingredients in a lazy susan or individuals bowls, don’t forget the ricotta and the parsley for garnish! Warm the corn tortillas in the oven. If you’re making this in advance, warm each ingredient in the microwave prior to serving. Enjoy!
by Paula D.
on November 14, 2018 3:21 pm in Food
I want to share these kitchen hacks with you, especially if you’re a cooking newbie. These tips will make the task of cooking less overwhelming so you can focus on the fun part: cooking, experimenting and eating! And even if you’ve been over the stove for as long as you can remember, I’m hoping some of these tips will be new to you and helpful.
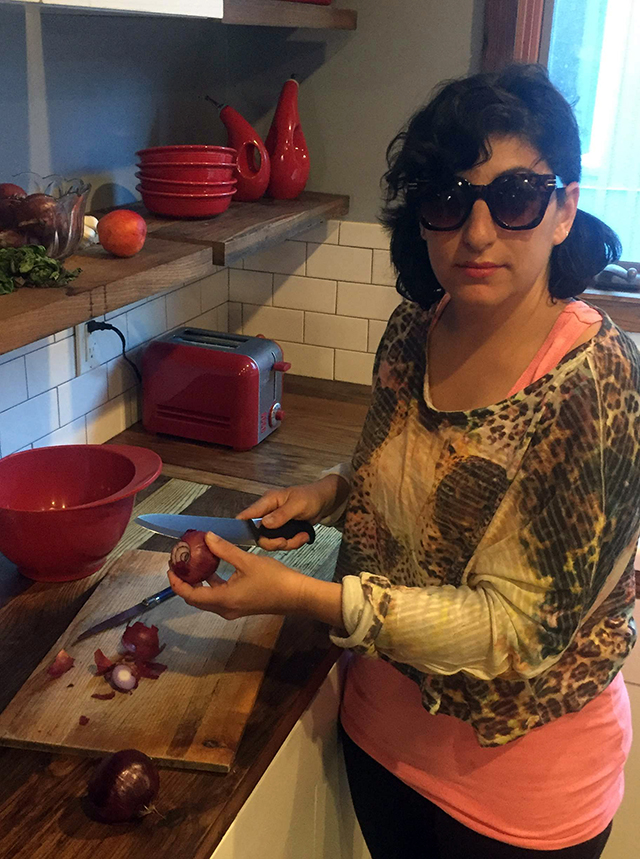
— Wear sunglasses while cutting onions. When you slice up an onion, microscopic cells containing enzymes turn into a volatile gas. These gases cause a chemical reaction similar to the ones in tear gas! Putting on sunglasses minimizes the tearing and burning reaction to your eyes. Keep a pair of sunglasses in your kitchen utensil draw so they’re always handy.
— If you’re cooking a large meal, keep a bowl lined with a compost bag on the counter where you’re prepping. This way you can put the veggie scraps directly into the bag, instead of making 7 trips to the compost bin under your sink or the bag in the freezer.
— Be good to yourself and buy pre-peeled garlic. It stays fresh and it’s well worth the extra 2 bucks. If you’re having a large dinner party there’s no question about it: buying pre-peeled garlic saves so
much time and there’s no mess.
— Rinsing dishes before putting them in the dishwasher is overrated and wastes time and water. Unless there is something really caked on, just scrape the dish in the pail and put it directly in. Worst case, if there’s a little schmutz on a dish after the wash, you can hand wash just that one. But most times they all come out perfectly clean.
— Some people feel it’s better to keep vegetables in the grocery bag because the produce lasts longer with some humidity but the difference is unnoticeable, am I right? Take your vegetables out of the plastic so you can actually see what you have in the refrigerator. Line the crisper draw with one dry paper towel and place the unwashed veggies there. Next time you make dinner, you won’t have to bend over the draw
and rip bags open to see what you have in.
— Speaking of the fridge, don’t put basil in it! Basil is temperature sensitive and the leaves will turn black if it’s too cold. Keep the bushel on the counter in a clear vase. Trim the ends and put it in water – like a basil bouquet! All of the other soft herbs such as parsley, cilantro, dill, tarragon and mint can go in the fridge uncovered in a glass of water. Hard herbs such as rosemary, thyme, chives, sage, and oregano should be placed in a tupperware container with a damp paper towel. This helps hold in moisture preventing them from drying out. Your herbs can last two weeks if cared for in this
way!
I have more kitchen hacks to share so I’ll be sure to write a part 2. Stay tuned.
by Paula D.
on November 6, 2018 8:09 am in Events
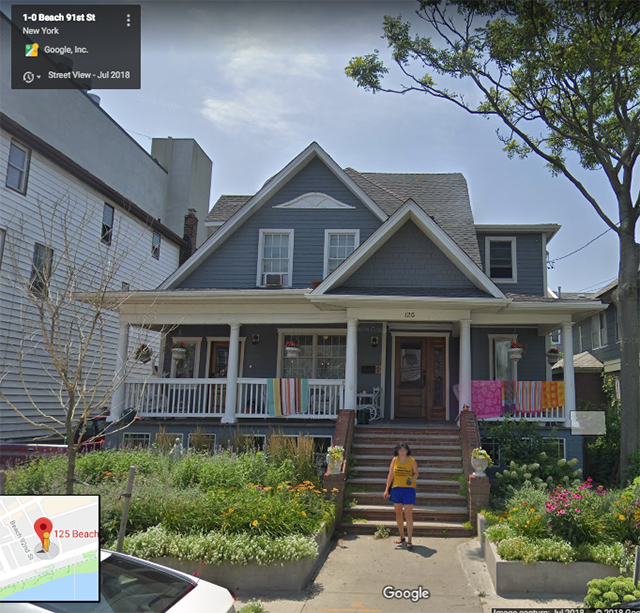
Glory #1: I receive a text message of a screenshot from my housemate Olga. The photo was of ME ON GOOGLE MAPS!!!! I immediately posted it to Instagram and Facebook and then sent it to my family. To be captured on Google Maps is a huge deal and everyone on social media was congratulating me. I was overjoyed! I didn’t get much work done that day. I keep refreshing my Instagram (@theglorifiedtomato) to see how many more likes were accruing. In the photo, the garden is voluptuously overgrowing and the brightly-colored beach towels adorn the porch railing. I’m dead center in front of the house holding a cocktail!
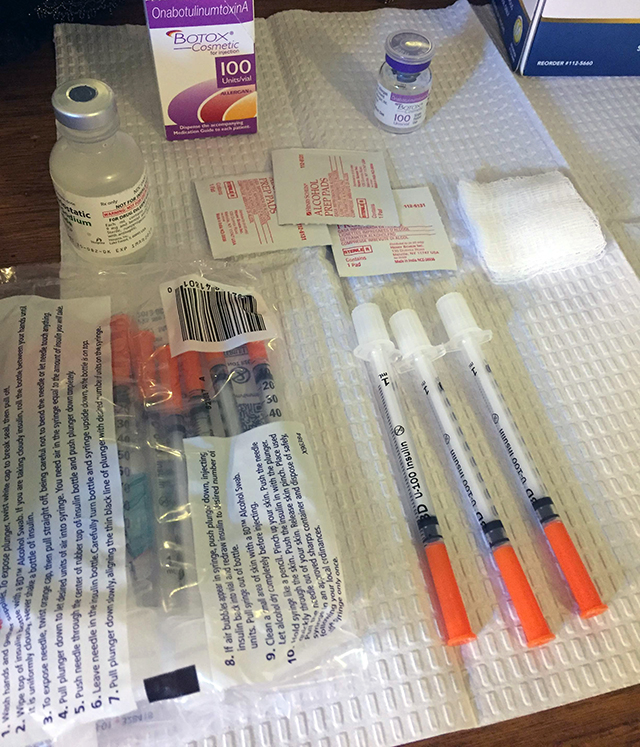
Glory #2: I got Botox! My friends Franny and Jason had a Halloween-inspired wedding at which costumes were encouraged. Franny is a huge TV buff and we both love Fran Drescher. So, I thought for the wedding I would dress as The Nanny! To pull off the costume, I needed to expose my forehead to convincingly recreate Fran’s iconic widows peak. “What better time to remove the wrinkles on my forehead?” I thought. Like my sister says, “You gotta tune up the car before it breaks down.”
Botox takes 3-7 days to kick in, with 14 days to see the full results. The first four mornings before I put on my makeup, I spent an unreasonable amount of time staring closely into the mirror, moving my eyebrows in various positions. On day five, I finally started to freeze up! Like magic, the wrinkles on my forehead, my 11 lines and baby crow’s feet just vanished. It’s an odd sensation when you can’t move the muscles on your face but you get used to it. l love modern “medicine”.
Glory #3: I ran into my friend Kurt at Pasty’s EP listening party at Rustwoods. I hugged Kurt hello and no more than five seconds later he said “So, are you having the Christmas party this year? I need to clear my calendar.” My eyes lit up like a freshly-decorated Christmas tree: it’s mid-October and people are already asking me about the Christmas Party!?!? I reassured him that the party was in fact happening and he would be the first to know the date.
Oh the glory!
PS: I LOVE CHRISTMAS!


