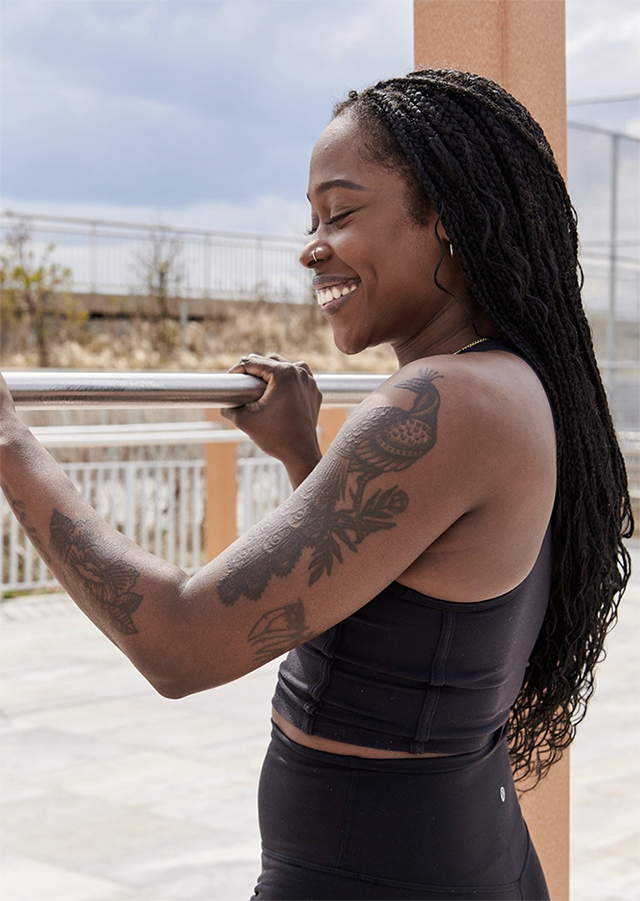
My fit form has lost its shape since surfing days have dramatically slowed …ugh winter. Not only that, when I’m not active, I get, as they say, “Down in the dumps.” Exercising releases endorphins and serotonin that improve our mood. This is why you’ll hear people say, “I’m addicted to the gym.” This is an addiction we can all embrace in 2023. That feeling of feeling good after a workout is everything.
Lately, I’ve noticed some friends sharing stories on IG of their workouts at Goodform Studio. The gym opened back in October 2022 and I’ve only heard great things since.
I checked out the website goodformny.com. I read, “BodyCamp is a total body strength and conditioning session. Improve your energy levels, metabolic rate, strength, and endurance. This class will leave you alert and ready to take on whatever comes your way.” This is exactly what I needed. I signed up and the next day, I headed over for the 8:30 a.m. session.
I was welcomed by owner Monice Small, better known inside and outside the studio as Mo. She was so welcoming. Mo helped me log in and informed me of what to expect from the class. She asked if I had any physical limitations and if I had a fitness focus. I told her I surf and wanted to work on strength training. She thought the BodyCamp class would be perfect for me and she also recommended I try the 60-minute Pilates workout on Saturdays at 8:45 a.m.
 Monice Small, owner, and coach at Goodform Studio
Class began and Mo explained and demonstrated the exercises. The music started pumpin’ and we got lifting with the kettlebells. The vibe was so fun, upbeat, and not intimidating at all.
Later that day, around 4 p.m., I felt my quads, calves, and biceps were sore – the good, good kind of sore that feels fantastic. Actually, who am I kidding, my whole damn body was sore, what a workout!
I’ve signed up to keep in good form over the winter. This will guarantee that come spring, I’ll be strong and conditioned for surfing. There are several affordable membership options allowing for flexibility with your schedule and commitment level – Monthly Unlimited, Weekly Unlimited, 8 classes per month, and 4 classes per month. There’s a range of training options to keep your workouts fresh. They include – BodyCamp (total body strength), GF Greatest Hits (quick, intense bursts of exercise, followed by short recovery periods), Pilates, Cardio Kickboxing, and more. Visit goodformny.com for details and get in good form for 2023.
Goodform Studio is located in the old Wave Building – 88-08 Rockaway Beach Blvd., Queens, NY 11693, (516) 632-0859. For workout info, make sure to follow Goodform on Instagram – @goodform_studios See you at the gym!
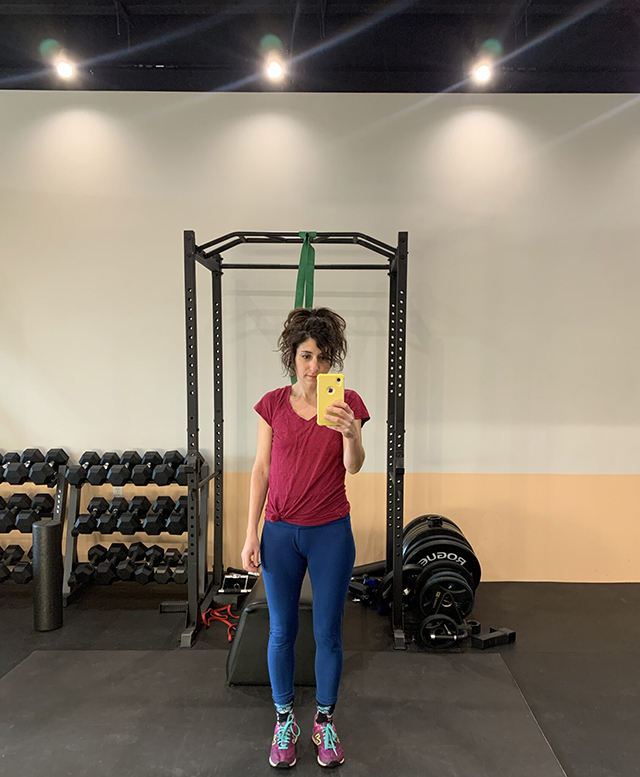
Pre-workout selfie
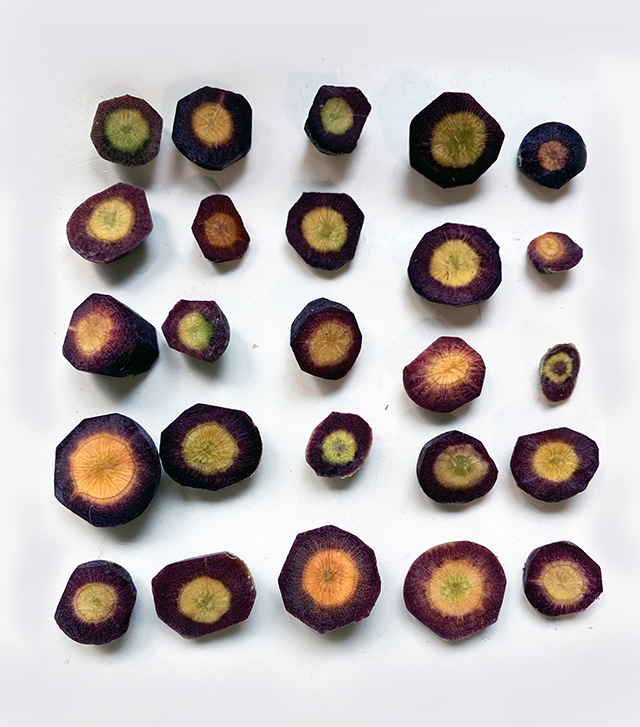
“Carrots struck again at the free fridge.,” read a text from my friend Mike B. Every so often a very large, beautiful bag of multi-colored carrots are donated to the community fridge at 166 Beach 92nd St. The carrot drop is a mystery to many and we’d love to know who the generous carrot-donator is? Please come forward!
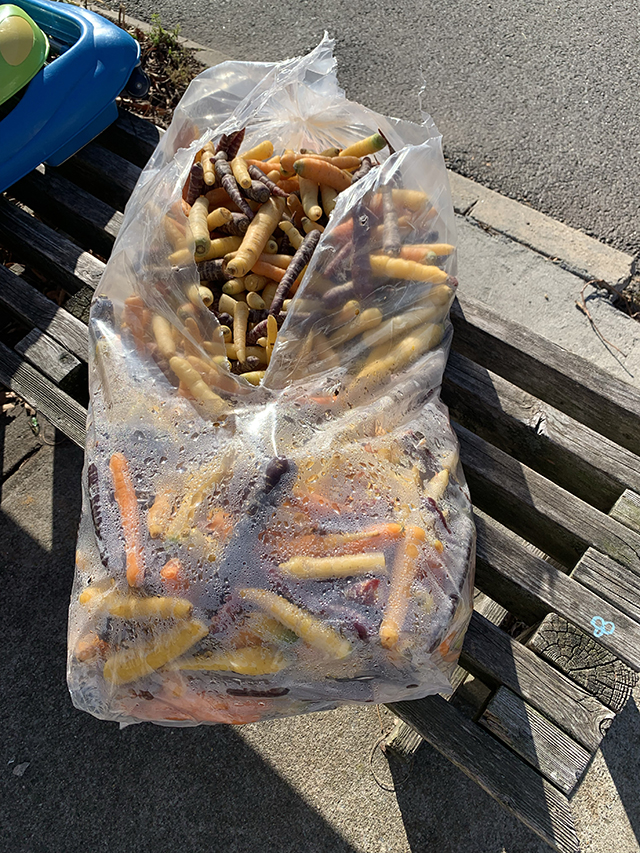
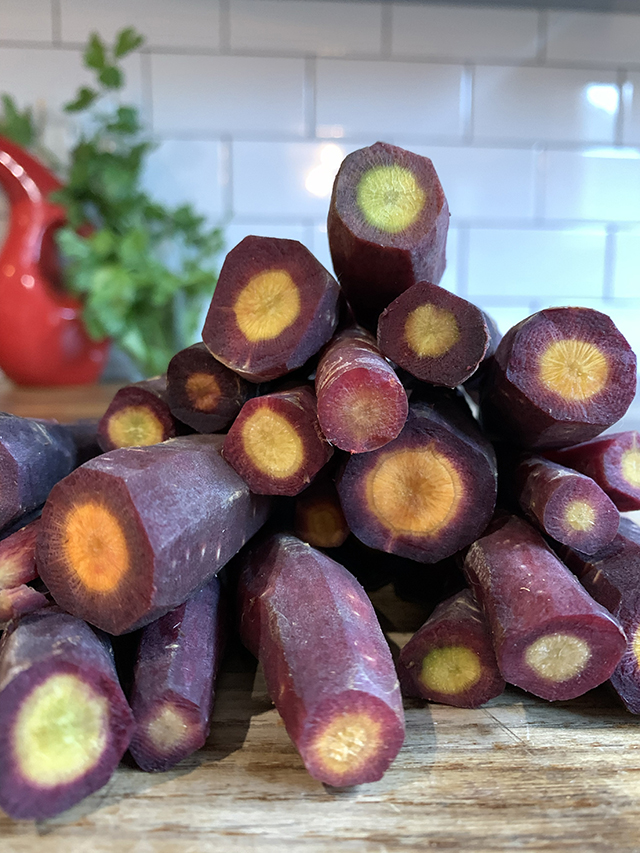
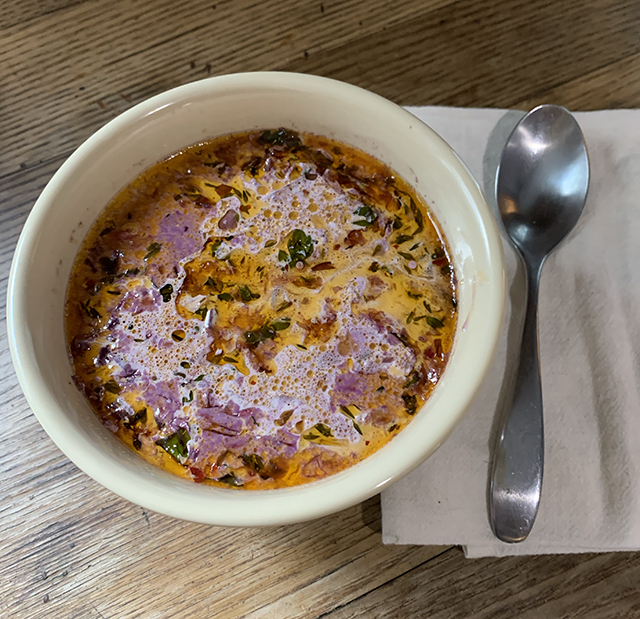
I took some purple carrots. I decided to make a creamy carrot soup with fresh herbs and garlic. Soup calls to us during the cold winter months. Carrots of many colors have many health benefits – fiber, vitamin K1, potassium and antioxidants. Color in all food is mostly made from the following compounds: carotenoids (orange and yellows), flavonoids (blue, red and creams) and chlorophyll (greens). Colorful food – fruits and vegetables contain the vitamins and antioxidants we need for a healthy diet.
This Creamy Purple Carrot Soup recipe is hearty and rich. The thyme and parsley complement the semi-sweet purple carrot flavor. I like spice! If that’s you, add a healthy amount of red pepper flakes to keep warm. You can puree the soup but I thought the color was so beautiful as is, I let it be.
Creamy Purple Carrot Soup
Ingredients:
8 carrots peeled and chopped
2 shallots diced
1 white onion diced
10 cloves garlic chopped
2 tsp Thai red curry paste
4 tablespoons butter
1 cup heavy cream
6 cups water
1 tablespoon Better Than Bouillon (vegetable/vegetarian)
Fresh Thyme
Fresh parsley
Salt, pepper, red pepper flakes to taste
Directions:
-
In a large pot, melt the butter over medium heat. Add the shallots and onions. Saute for 5 minutes. Season with the spices. Add the garlic and Thai red curry paste – saute for 3 minutes.
-
Add the carrots, water, Better Than Bullion, fresh herbs and bring to a boil.
-
Reduce heat and simmer until the carrots are soft – 15 minutes. Add the heavy cream, simmer for another 10 minutes. Top with parsley and serve hot.
Recipe adapted from: thestayathomechef.com
We tend to think about donating food around the holidays but the truth is, people are challenged by food insecurity year round. The U.S. Dept. of Agriculture defines food insecurity as a lack of consistent access to enough food for an active, healthy life. Hunger refers to a personal, physical sensation of discomfort, while food insecurity refers to a lack of available financial resources for food at the household level. According to feedingamerica.org, in NYC, 1 in 10 people face hunger and 1 in 7 children face hunger.
Since the pandemic, there has been a spike in food insecurity. We all need help at times, so don’t hesitate to access this resource. Anyone can take food from the community fridge located at 166 Beach 92nd, between Rockaway Beach Blvd. and Holland Ave. It’s open 24 hours / 7 days a week.
The Community Fridge Project is generously brought to us by the Rockaway Mutual Aid, with support from Campaign Against Hunger. It is kindly cared for and hosted by Rockaway resident Becky Glennon and her family.
Community members and local businesses help fill the fridge. Please consider donating – any time of the year. Drop food directly at the fridge or contact The Rockaway Mutual Aid. In addition to food, The Rockaway Mutual Aid provides services such as food drop off to elderly folks, health care information, family/child care resources and more. To donate or volunteer, visit rockawaymutualaid.com and follow on IG @rockawaymutualaid.
To request resources and support, call (732) 654-2505, visit the website or the Facebook page.
Gift giving is part of the holiday season – for better or for worse. My intentions are to give meaningful presents but then end up delaying because I haven’t thought of that perfect gift idea. Then I’m scrabbling. If this sounds familiar “the gift of food and drink” is a great last minute solution.
Let’s get the juices flowing… fancy coffee, tea, seltzer, kombucha, wine, beer or liquor. I say fancy because I’d suggest buying higher-end. Purchase something the recipient would not often splurge on.
For your friends and family who enjoy that cup of cheer (or many cups of cheer), you can’t go wrong with a nice bottle of wine, an IPA, Peroni or that bottle of Johny Walker Blue. Take it up a notch and accessories with a nice bottle opener, wine topper or beer mug. I’d bet Uncle Pat will appreciate the gift of drink more than a matching glove/scarf/hat set.
For the kitchen…
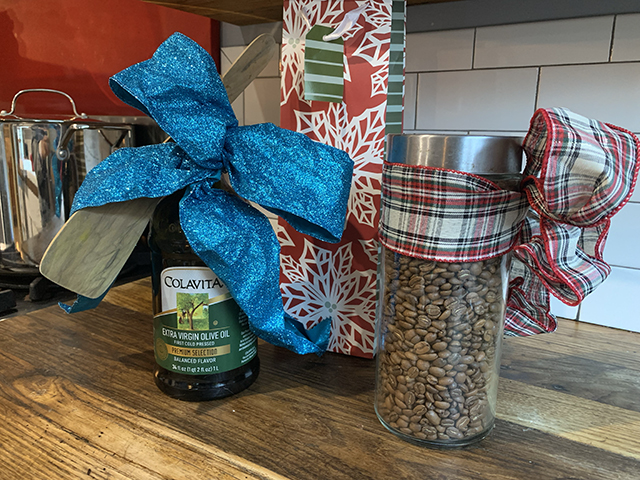
Olive Oil – High quality olive oil is a staple in all home chef’s kitchens but the good stuff gets pricey. My go-to brand is Colavita and you can find it locally in the supermarkets. If you can get to an Italian specialty store, there are many delicious imported options to choose from. Wrap the bottle with a bow. Tie on a wooden spoon for a lovely presentation. You can get a wooden spoon or other cooking accessories from the dollar store – super cheap but adds the extra element of “care.”
Sweets – Fill a large mason jar with holiday candy or chocolate. Don’t bother wrapping it up – the colorful candy is festive enough, just add a cute bow. The mason jar is also part of the gift – we always want and need them.
Homemade gift baskets. Make a personalized gift basket or bag including ingredients to make your loved one’s favorite meal – an Italian basket, vegetarian basket, Indian food, a taco basket. To fill the basket on a budget, consider including staples like garlic, onion and potatoes. They will look beautiful in the presentation and they don’t need to be refrigerated.
Spicy – buy spices from the supermarket, remove them from their original container. Put each one in a small mason jar. Label them and you’ve created a personalized spice set.
The list goes on and on. Get creative and you can find everything you need for your last minute shopping in the supermarket. Food and drink as gifts are useful, unlike the foot massager, Ouija Board, beer hat, pizza blanket, change collector… you know, the well intended gifts but you’re like, what the hell am I going to do with this!
Happy Holidays!
I saw my sister Maria last week at my Goddaughters birthday party. I was ranting to her about how busy and stressed out I am with work. I mentioned I didn’t have an idea for my column this week and she said, “Oh, this is easy, bake Christmas cookies and share the recipe.” Flailing my arms in the air, I respond, “But I don’t have time!!” Maria said, “Calm down. I have pictures of the Italian Christmas cookies from last year. You love them, lie and say you made them.” We both were like, “Yeah this is a great idea,” and started laughing so hard!
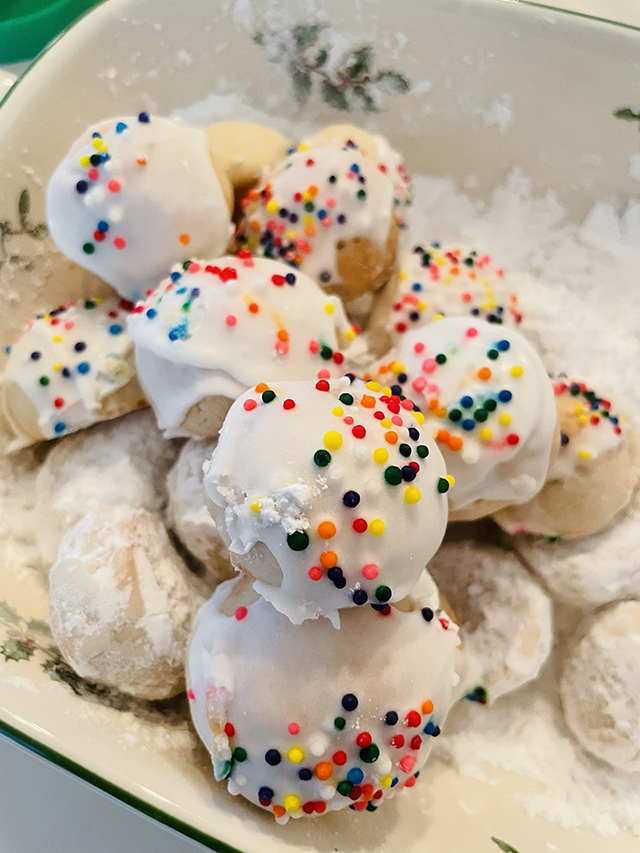
My favorite Italian Christmas cookies are soft and cake-like. The almond extract offers a delicate nutty flavor. They’re not too sweet. The vanilla glaze creates a hard casing. It’s a nice textural contrast to the softness inside. They taste amazing and also look beautiful. Ornament the snow white cookies with sprinkles for festive appeal.
You can make Italian Christmas cookies in advance – always helpful during this busy time of year (insert head explode emoji here). Freeze them for up to one month. My sister Maria said they’re a piece of cake to make! I hope you enjoy these cookies as much as I do.
INGREDIENTS:
For the cookies:
2/3 c. granulated sugar
1 stick unsalted butter, softened
2 tsp. vanilla extract
3/4 tsp. almond extract
3 large eggs, room temperature
2 1/2 c. all-purpose flour, plus more for dusting
2 tsp. baking powder
3/4 tsp. salt
For the glaze:
2 c. powdered sugar
3 tbsp. milk
1/2 tsp. vanilla extract
Red and green non-pareil (the tiny ball) sprinkles, for decorating
DIRECTIONS:
For the cookies:
- In the bowl of a stand mixer fitted with a paddle attachment, beat the sugar, butter, vanilla extract and almond extract on medium until smooth and fluffy, about 2 minutes. Add the eggs and beat until combined. (The batter will look separated.)
- With the mixer on low, gradually add the flour, baking powder and salt. Beat until all of the dry ingredients are incorporated. Wrap the dough tightly in plastic wrap and chill for at least 1 hour or up to 4 hours.
- Preheat the oven to 350°F. Shape the dough into about 36, 1-inch balls (lightly dusting hands with flour, as needed) and place on 2 parchment-lined baking sheets, spacing each at least 1-inch apart. Or, if desired, roll each dough ball between your hands (lightly dusting in flour if needed) into a 4-inch long log and coil each piece into a mound.
- Bake the cookies until set and very lightly browned on the bottom, 10 to 12 minutes. Transfer the cookies to a wire rack to cool completely, about 30 minutes.
For the glaze: In a medium bowl, whisk together the powdered sugar, milk and vanilla extract. Dip the top of each cookie in the glaze, allowing the excess to drip off and then sprinkle with the non-pareil sprinkles. Let the cookies stand until the glaze hardens, about 30 minutes.
Recipe originally from thepioneerwoman.com
For more holiday cheer, follow me on IG – @theglorifiedtomato.


