by Paula D.
on November 29, 2020 10:51 am in Food / Recipes
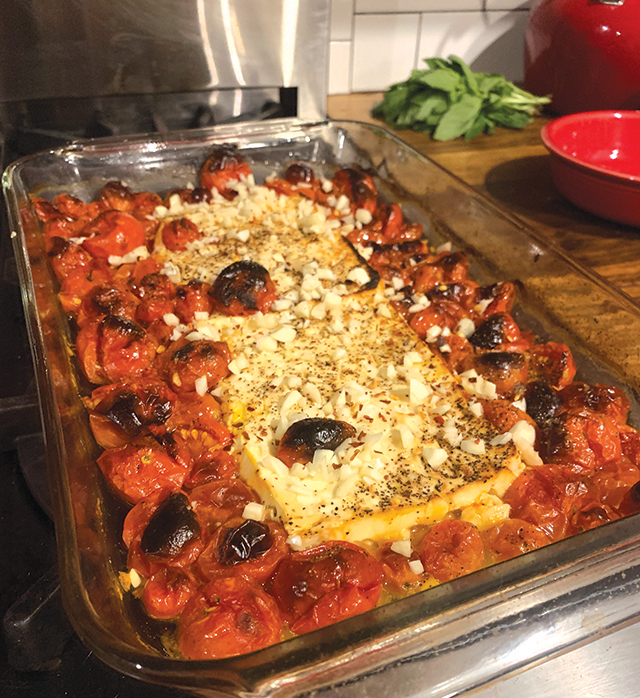
A friend of mine posted a video on his Instagram story showing sizzling cheese and roasted tomatoes hot out of the oven. It looked decadent – heart-eye emoji sent. He responded and shared the recipe with me. It’s from grilledcheesesocial.com and it’s called Baked Feta Pasta with Cherry Tomatoes, Garlic and Basil.
The blogger MacKenzie Smith, annoyingly beautiful and seemingly perfect, is a two-time Food Network Champ, Cookbook Author, Cheese Expert (really??), and Executive Chef in Florida. She writes that this is a quick after-work meal that is delicious. Well, I’ll give her that. It’s a weeknight homerun. But I would argue this is more than that – an impressive dish worthy of a dinner party main course.
I have the directions outlined below but basically, all I did was douse the baking dish with olive oil (Colavita is my fav), placed the feta in the center, and threw in a bunch of tomatoes. While that was cooking, I chopped the garlic, poured a glass of wine, placed Billy Joel’s Turnstiles on the turntable, put on the water for the pasta, and sat down with the NY Times while I waited.
Once the feta started bubbling (45 min.), I took it out of the oven, added the garlic, and combined it with the pasta and fresh basil. I think the fresh basil was the key ingredient. That pop of herbal freshness with the rich, tart cheese is fantastic. So I recommend adding a generous amount of basil.
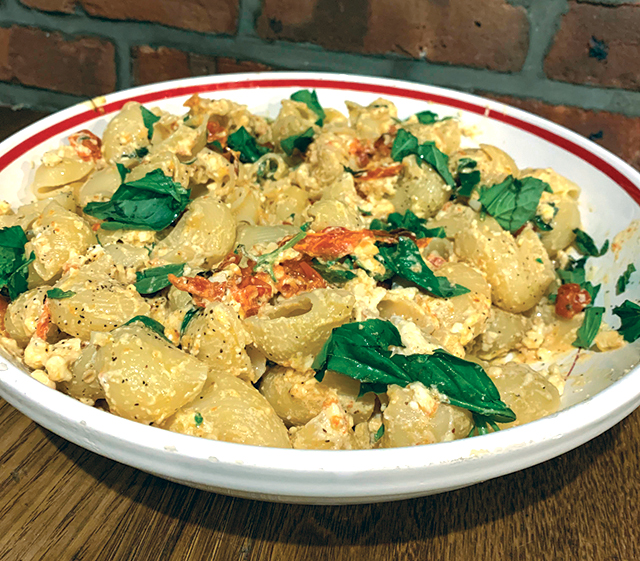
Baked Feta Pasta with Roasted Tomatoes, Garlic, and Basil
Ingredients:
- 1 pound bowtie pasta
- 2 thick slices of fresh feta (you can find this at a specialty market or at most deli counters at your supermarket)
- Cherry tomatoes
- 4-5 cloves garlic
- Basil (1 bundle, to taste)
- Salt
- Red Pepper Flakes
- Olive Oil
Directions:
- Preheat the oven to 400. Add olive oil to a baking dish and toss with whole cherry tomatoes, salt, and pepper until coated.
- Add the feta in the middle and top with a splash more of olive oil plus more fresh pepper Bake for 30 minutes.
- Meanwhile, boil a pot of water and make the pasta.
- After the 30 minutes, crank the heat up to 450 and bake for another 5-10 minutes or until the feta and tomatoes have browned.
- Remove the baking dish from the oven and add garlic and red pepper flakes. Stir so the residual heat cooks the garlic and releases the flavors from the red pepper flakes.
- Toss in the pasta and stir again. Finish with fresh basil, another splash of olive oil, and season with salt and pepper.
I have a tendency to overbuy when I’m working on a special recipe or for the holidays. I ended up with way too much feta. A few days later I tried the same recipe concept again but with different veggies. Essentially whatever I had in the fridge I used – broccoli, artichoke hearts, and tomatoes. This version also turned out delicious! So you can get creative and experiment with this homerun vegetarian dish.
by Paula D.
on November 29, 2020 9:48 am in Animals / Cats
In August I wrote about Sweetie, a ”teenage” cat mom who appeared in my backyard with a batch of kittens. I wanted to follow up and share the rest of Sweetie’s journey with you.
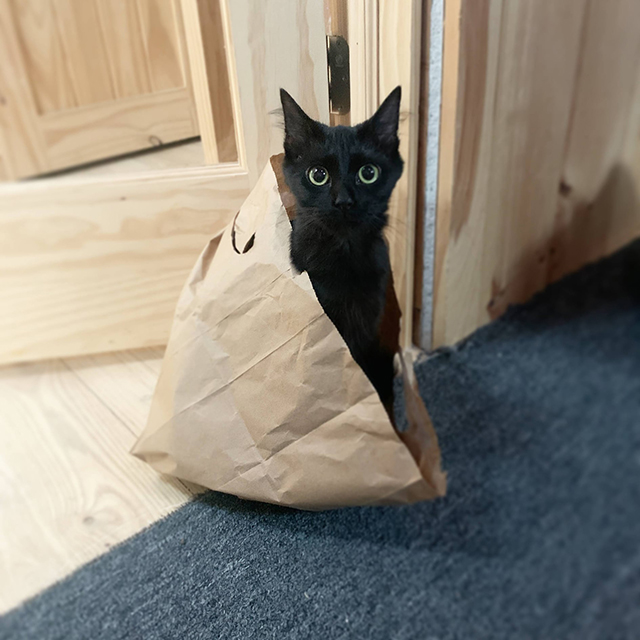
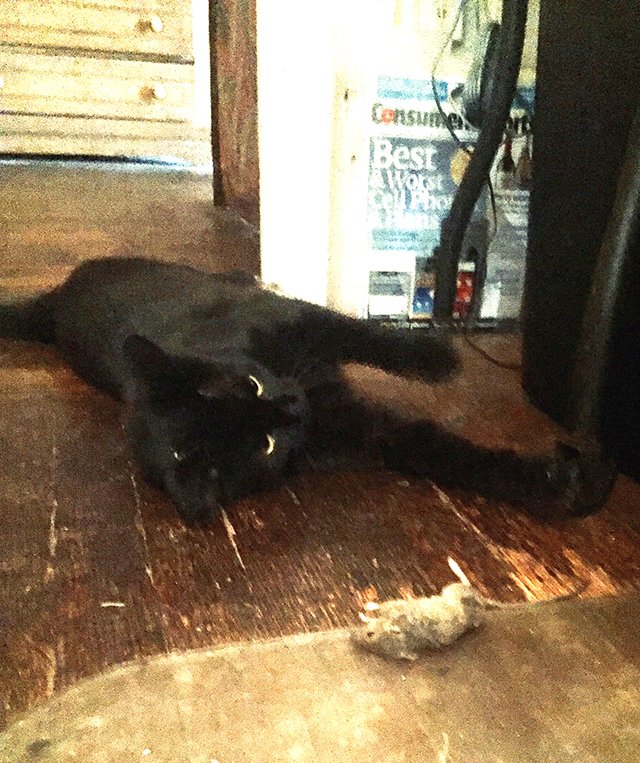
It’s been a long road. We rescued Sweetie and her three kittens July 6. It was difficult to get appointments for spay/neuter and vaccines due to Covid-19 delays. And it took some time to get the kittens adopted into good homes. Meanwhile, I grew very much attached to Sweetie. She’s a special cat – very friendly, cheery and mild-mannered. In the four months since her rescue, she learned how to love people, to cuddle and play. Milestones like her discovery of going inside paper bags and the first time she kneeded on my lap were truly “proud mom” moments for me.
We considered keeping Sweetie in our backhouse bungalow but after much back and forth – me wanting to keep her, my husband being pragmatic – we felt it wasn’t fair to her. Sweetie was alone a lot. And it wasn’t ideal to have a cat in Matt’s place of work. Sweetie deserved a real forever home where someone could give her all the love, attention and cat treats she deserved.
Finally, I worked up the courage to write the Facebook post explaining Sweetie’s situation. I typed and cried.
Two days later we hear from our good friends Maggie and Or. Maggie’s parents were seriously interested! This was my ideal dream for Sweetie. I wanted a family that would give her an abundance of care. As Mr. and Mrs. Carson are retired, they have the time to dote over her. And I believe with Covid-19, being more confined than normal, the company and comfort of a cat was something the Carsons were searching for! Also selfishly, I wanted Sweetie to live with someone I could keep in touch with – to get updates, pictures and videos. This was the purrfect match!
As I thought, with Sweetie’s easy-going demeanor, it only took one night for her to settle in. This is quite rare for cats, as they’re territorial. Normally it takes a minimum of a week for a cat to feel comfortable in a new environment.
Something really big happened on her first morning in her new home: Sweetie caught a mouse and presented it to Mary as a gift!! Mary was surprised and delighted! She took photos of Sweetie with her kill and sent them to us!! I responded, “Now my heart is healing.” That was the moment I knew Sweetie was happy with her new life! I cried again, but this time, they were tears of joy… mostly.

The mouse kill has a quirky connection. Mary Carson has a Youtube channel where she performs puppeteering. Her puppet is a mouse! Mouse performs skits, other times he sings. In one recent video “Shine On Harvest Moon” (great song), Sweetie makes a cameo in the background! I have high hopes Sweetie will become a famous Youtube cat influencer! Check out Mary Carson’s lovely videos here. If you can help out a furry feral before the cold of winter, please do! Here are some helpful resources on TNR: animalalliancenyc.org and faithfulfriendsny.com. Note: If you see cats with their left ear tipped, that means they have already been fixed.

Did you know that Claudette Flatow of Cuisine by Claudette (CBC) has a cooking show on Youtube? It premiered three weeks ago. It’s called Cooking With Claudette. The episodes teach you how to create delicious recipes like a pro — vegan ones too! Claudette is happy to share her cooking secrets and tips on the show, and one of the first things you learn is that it’s all about prep, technique and practice. Besides being instructive, the episodes are downright hilarious.
In Episode 1: Moroccan Roasted Stuffed Peppers, Claudette is wearing an apron that reads “Droppin’ new recipes on your ass.” Whose mom would wear that?! The editing is on point. Claudette is in thought, there’s a long pause … you think it’s the beginning of an awkward silence, then you hear cricket chirps spliced in! What also adds to the humor of the show is Clauddette’s no-frills, “I mean business,” bold attitude. If you ever met Mrs. Flatow, you know what I mean. Casually grabbing flame-roasted peppers off an open fire on camera is just one of Claudette’s “dang” moments in the first episode.
It seems Claudette wearing “words of wisdom” aprons is going to be a thing. In Episode 2: Spinach Shepherds Filo Pie, She’s wearing an apron that says “Your opinion is not in the recipe.” Spoken like a true chef. You won’t spot a measuring cup on the counter, but Claudette knows what a quarter cup of milk looks like. “Use spinach, you can also use kale … make it vegan, make it with beef.” It’s this “a little bit of this, a little bit of that” approachable style that Claudette offers in her videos. It gives the viewer at home options, making the recipe feel like your own creation. That type of flexibility is appealing especially for newbie cooks.
The local eatery, Cuisine by Claudette has a lot on their plate. The team operates several locations – their flagship at 143 Beach 116th Street, their location in Arverne – 190 Beach 69th St., the juice bar at Burn Fitness, 103-32 Rockaway Beach Blvd., and seasonally they have digs at Riis Park. In addition, CBC caters and hosts community events.
So, how the heck do they have time to produce a weekly Youtube series? I reached out to John Efrati, Manager of CBC and got the behind the scenes intel.
As everything at Claudette’s, it’s a family affair. Tatiana Osoria– John’s wife– created the fun, spot-on illustration of Claudette that is the opening image on the Youtube video. Tati also films, edits and directs the videos. More help comes along from employee Rianna Salzaon who writes up the recipes. The attention to detail is apparent in these videos, one example, Claudette has her very own catchy theme song. It’s written and sung by Syndey Willams, produced by Sebastian Sheppard – all employees of CBC! They are a talented bunch in the kitchen and out!
Tune in every Saturday morning at 10am for a new Cooking With Claudette episode and a new recipe to try! Follow @cuisinebyclaudette on IG for updates and subscribe to the Youtube channel here.
Last weekend, my sister and two of her children came to visit for a family fun escape to Rockaway. Normally they visit in the summer, but between Covid-19 and the renovation work we’re doing at the house, the timing didn’t work out.
In the summer, keeping a 9 and 10 year old occupied is easy breezy – you take them to the beach all day, get burgers and fries at Rippers, and in the evening you walk them up to Low Tide Bar and they dance until exhausted. Done.
This go-around I had to come up with an itinerary. I thought I had a solid plan until we arrived at the park on 108th. “This was the big surprise Aunt Paula,” My niece said. “Didn’t you see the huge cement whale?!!” I responded. They ran around for all of 15 minutes. I said to my sister, “I’m surprised the kids don’t want to stay longer.” “Yeah, it’s really a beautiful park, but the girls are a little old for this.” Natalie said. I had no clue and then I felt so out of touch. I guess at 10 they’re more interested in boys than concrete whales. But I didn’t know that. I personally love the concrete whale! I guess I’m officially that weird aunt.

Teachable moment – 10 yr olds are too old for the park
After the park I was on high alert to make sure they had fun. I immediately thought: ice cream can not fail. We visited Mara’s Ice Cream Parlor (92-14 Rockaway Beach Blvd.). All the pink and beautiful decorations caught the childrens’ eyes. They ordered blueberry ices with gummy worms on top. We sat in the beach backyard and enjoyed the fun vibe. There are many photo ops which my sister was excited about. We took pictures in front of the colorful Whalemina mural painted by Geoff Rawling.
More pink caught the kids attention. We went into The Swellife next. It was great to see my friend Katie Long, owner of the boutique. She helped the kids pick out a toy each. The girls wanted to continue shopping and they suggested the dollar store. Great idea I thought. But when we arrived, they quickly realized this is not what they had in mind. I believe when they said dollar store, they were referring to Five Below. That’s like the suburban Long Island version of a dollar store, where they have cutesy made in China crap. They had no interest in the plastic dishes, screwdrivers, bongs, incense, and shaving cream that lined the shelves of the Rockaway-style dollar store. Weird aunt fail.
We headed back to the house for dinner. Everyone was hungry. I put on Connie Francis to set the mood for a beautiful Italian feast. They had many questions about the record player. Is that real? Are those CD’s? Where’s the remote control? Does it have Alexa? Still, they had fun digging through Matt’s vinyl and looking at the artwork. I let them pick out records and put them on. I think that at least was a hit.
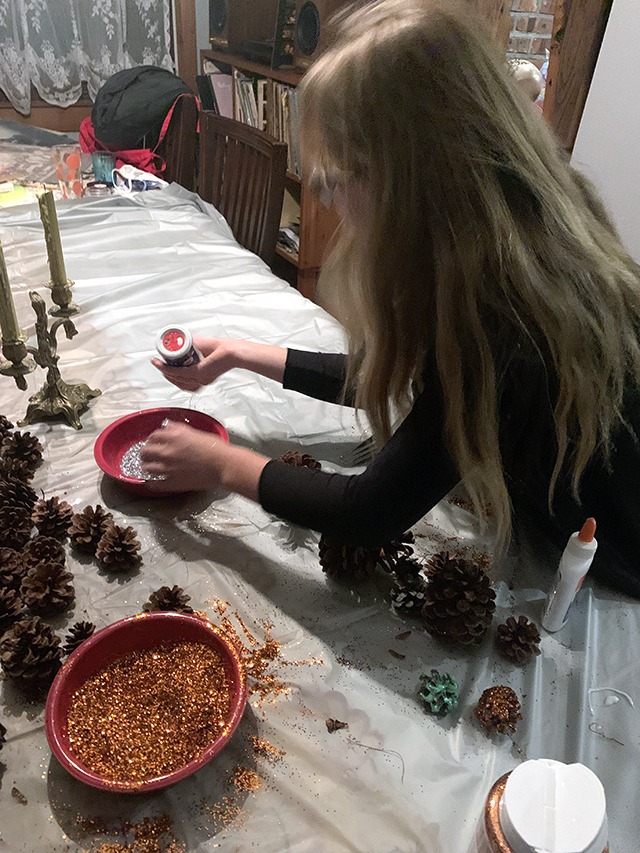
And of course, I had to take my sister to the new swanky rooftop bar at The Rockaway Hotel for some much-needed after-dinner drinks. We had cocktails while the kids ate raw clams for the first time. After our “adult time” we headed back to the house for a special craft I had planned. My sister was very impressed I was allowing the girls to sparkle pine cones in the house. I didn’t get it at first, but slowly it became apparent this was a terrible idea. The sink ended up getting clogged with sparkles, glue and some ravioli bits left on the plates from dinner. The cats had sparkles in their fur and I`m still cleaning up the glitter that’s now encrusted on the wood floors in the dining room.
All of that said, we had an awesome time and I love those little humans. And I’ve learned a bit. The takeaway: kids have an insatiable appetite for entertainment. Don’t let children wash the dishes. Hopefully, this will help other weird aunts navigate the waters of adolescent nieces and nephews.


