DIY Indoor Greenhouse
April is holding up its end of the bargain – rain, rain, and more rain. It’s needed to jump-start our gardens and the growing season. I’ve been outside whenever the weather permits, weeding, cleaning up leaves, and dividing/moving plants to new locations.
Normally I start my veggie seedlings in the Beach 91st Street Community Garden greenhouse. I’ve been a member for several years now. A greenhouse is typically 20 degrees warmer than the outside temperature. The average temperature this month in Rockaway has been about 55 degrees. So the greenhouse is cooking at a toasty 75 degrees! Perfect for germination. But alas, this year, the garden leadership committee has understandably delayed the opening as a safety measure because of… you know what.
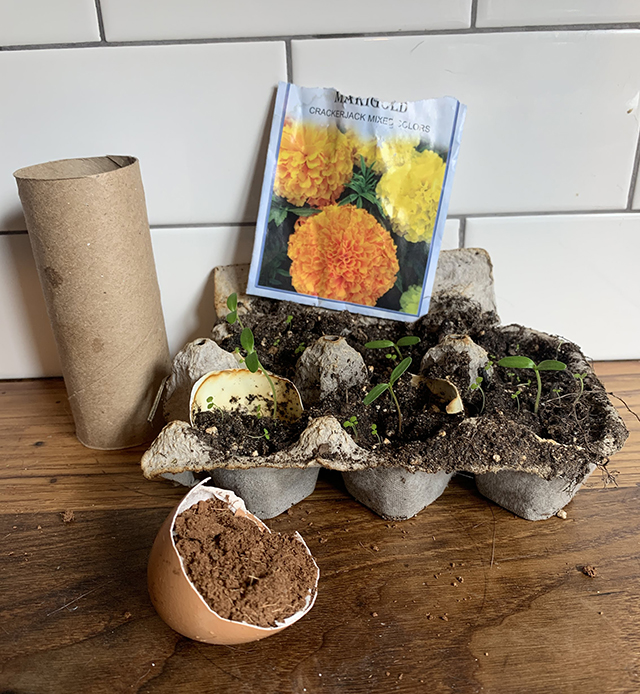
Without the luxury of a greenhouse this year, I had to adapt. I was about to buy seed starter kits on Amazon when I thought better of it. Why spend money on that when I can use what I have at home? I took eggs out of their container and put them back in the fridge in a bowl. Egg cartons are perfect for planting seeds. With cardboard cartons, you can put the plant directly in the ground. If you’re using a plastic egg carton, just use a spoon to loosen up the roots and soil before planting. Small plastic or paper cups, eggshells, avocado skins, cardboard toilet paper rolls housed in a cardboard box, and plastic food containers all work very well.
I have a few pro tips for growing seedlings inside. If you follow these guidelines, I’m sure you’ll have success!
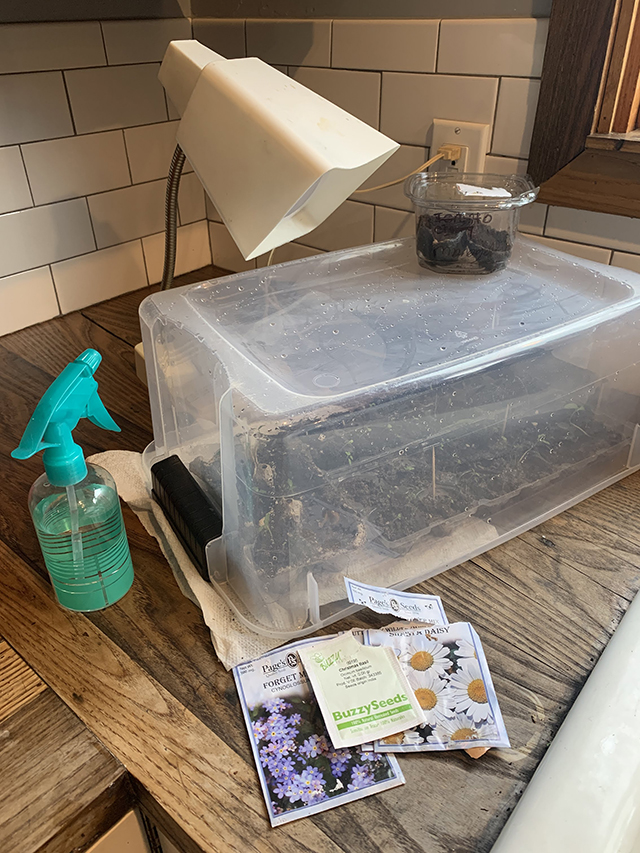
Moisture – Never, ever let the soil dry out! Check on them daily. Since seedlings are so delicate, a spray bottle is a great way to water as well as keeping the environment humid. Have some type of cover so the seeds are enclosed (like a mini greenhouse). A small plastic storage bin works great.
Lots of light – A sunny southeast-facing window is ideal for your seedlings to grow. Use a grow light for even better results or to supplement light if you don’t have good exposure in your home.
Soil – A light seed-starting mix works best. This always causes tiny growth to easily push through the soil to sunlight. But don’t stress this. I’ve used soil from my yard and I’ve never had a problem with that.
Plant appropriately – I plant three more seeds than the number of plants I want. Just in case some don’t germinate. It’s easy to forget and plant 10 tomato seeds and 10 cucumber seeds and so on. Then as they grow, you begin to realize you’ve over planted and you have no space for them! Most seeds can last a few years in a dry environment. So save what you don’t need.
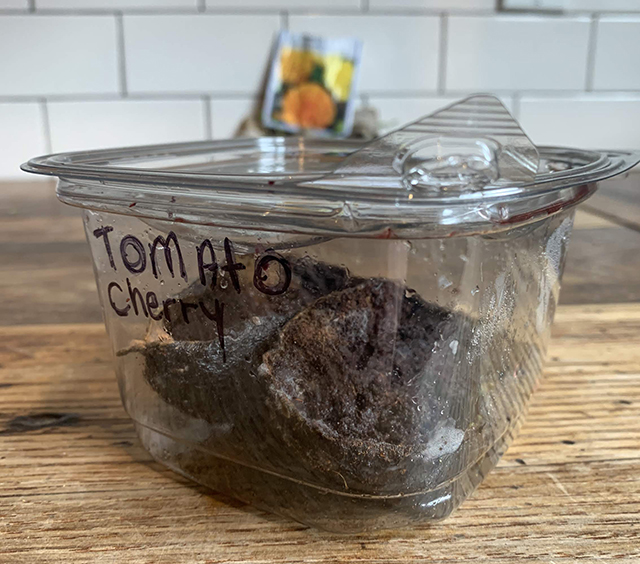
Label everything – I’ve made this mistake so many times, thinking “I’ll remember what’s what”. And then of course, I forget. Ultimately you figure it out but I suggest labeling so you can be prepared and plan out your garden. Write on the container itself or use wooden cutlery.
Acclimate for strength. About 6-10 days after the seeds have sprouted, you should bring them outside from time to time, to acclimate and get stronger. Do this on sunny warmer days. My father always told me never plant your garden before Mother’s Day. After May 15, it’s time to put the baby plants in the ground and once you do, they’ll really take off.
For more on gardening follow mw on Instagram.