Potatoes sprouted? Time to paint.
Much of my art is rooted in food—as a result of my fathers innate creativity, my Italian upbringing, the joy I find in gardening and all that weirdness that has transpired in my life thus far. Remember Butter Village? And my jello art adventures from last summer?
Food play has always been part of our creative wiring. As kids, we instinctively lined up peas, made carrot stick people, and constructed dramatic mashed potato mountains with exploding gravy lava until we were screamed at, right? It’s all art.

Brown bin composting is now mandatory in NYC – art projects first thought.
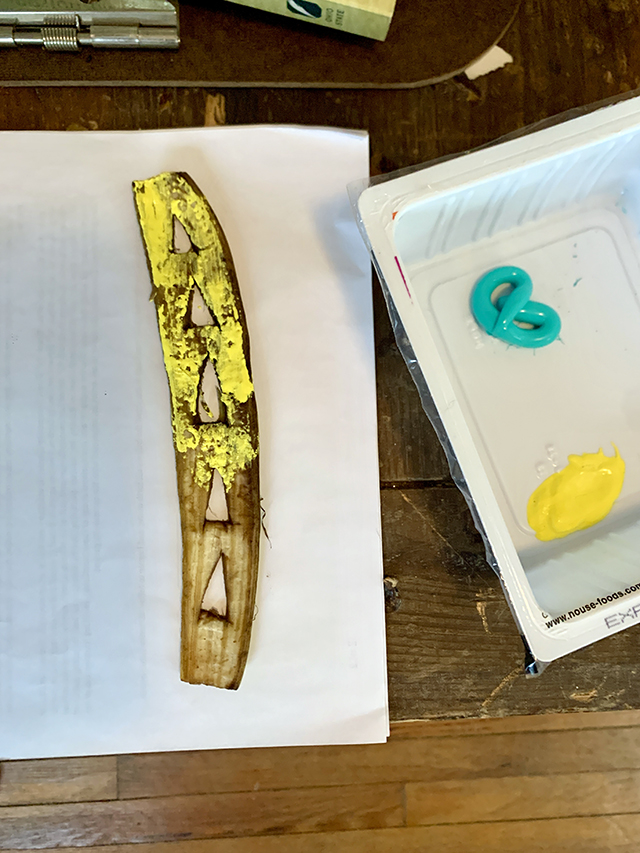
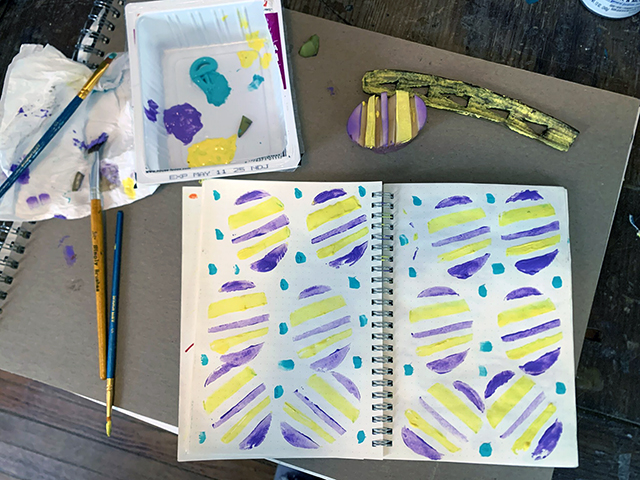
Here’s a fun one—for you, your kids, or for a therapeutic low-pressure craft hang with friends: food printing with compost scraps. Yup, pull some funky shapes out of your compost bin and get stamping. Potato ends, celery bottoms, halved-onions and banana peels work great. I used my butter carving tools to cut graphic shapes taking it one step further. As I normally do – for better or worse. I used an Easter spring color story. I’ve been working in a dedicated sketchbook the past few months and this is where I designed my food scrap prints. You can go larger or if you’re with friends or family, consider a group project with multiple people all working on the same piece – an unique way to collaborate and learn from one another.
The goal isn’t perfection—it’s play. Feel the brush, push the potatoes, mix the color and see where it takes you. You don’t have to be an “artist” to feel joy through art.
What you need:
3 paint colors
3 brushes
Food scraps from your kitchen compost bin.
Paper
Carving tools or knive
Recycled container for the paint. A tofu container worked perfectly for me.
An open mind
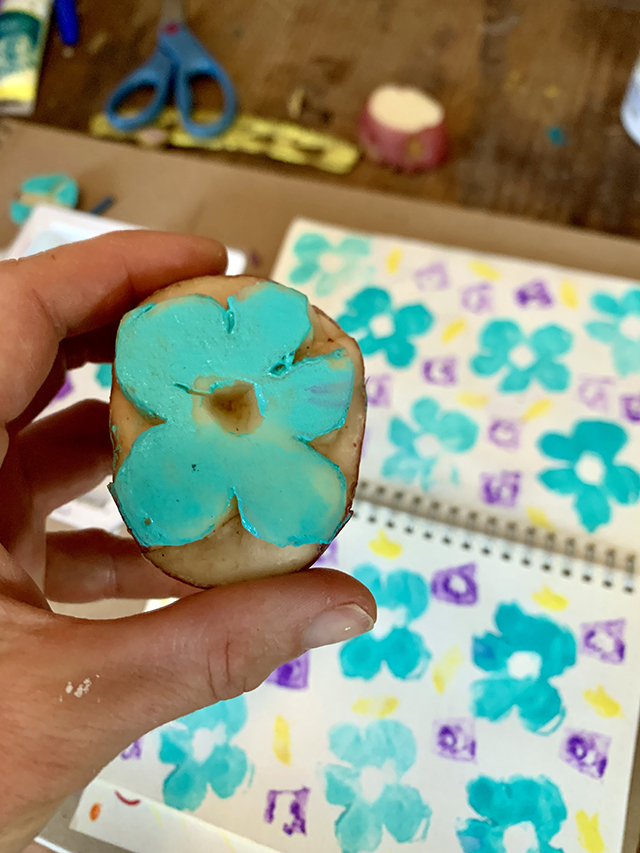
An old, halved potato makes the perfect stamp for Easter egg prints! Use pastel paints and carve different shapes for endless patterned art or for an easter gift or card.
Instructions for Compost Food Printing:
- Choose your scraps – Dryer fruits and vegetables work best but a little moisture is ok. Try potatoes, carrot ends, citrus peels, apple core, onions, or last night’s leftover dinner.
- Pick your paint colors – Set out your paints and use one brush per color to avoid muddying the colors. No water needed.
- Paint the food scraps – Apply paint directly onto the cut surface of the food.
- Start printing – Press the painted side firmly onto paper. Experiment with pressure, angles and patterns.
- Get creative – Try using two colors on one piece of food for a layered effect. Experiment with overlapping prints to build depth. Once your prints are fully dry, consider adding details or designs with markers, colored pencils, or pens for another feel.
Follow me doing all the things on Instagram: @theglorifiedtomato


