by Paula D.
on April 22, 2024 9:31 am in Recipes
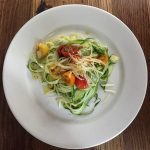
I’ve written about fennel on several occasions. It’s an Italian thing – the native Mediterranean vegetable is put on the table after dinner and before dessert… It’s good for digestion. But really, it’s just a segway to more eating, making it easier to justify indulging in the next course of sweet treats. Italians like eating it raw and dipping it in a mix of high-quality olive oil, freshly squeezed lemon juice, a dash of salt, ground pepper, and a sprinkle of red pepper flakes.
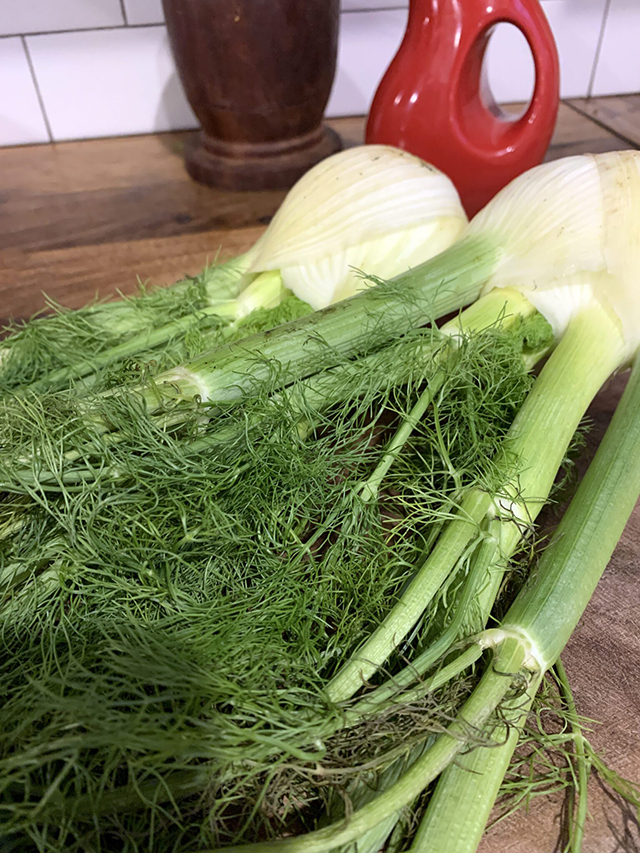
But you want to know something… I’ve never cooked it. Fennel, although not a root vegetable, belongs to the carrot family and it’s also an herb. Make use of all parts of this versatile plant for a range of culinary delights!
My friend Kaori and our friends gathered for a little farewell pizza party. Kaori and her man, “Washed Up” Zak were leaving for a three-week journey to Japan to visit family and then they headed to Indonesia to surf! In prep, Kaori cleaned out her fridge and shared some veggies with us. I grabbed the fennel.
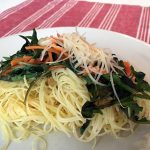
I was interested in Kaori’s method of preparing fennel. This versatile herb is also incorporated into various Asian cuisines, lending its distinct flavor to stir-fries, soups, and salads. Kaori mentioned that she makes caramelized fennel, enjoying it with protein or as a snack. She shared her recipe with me and it’s simple and delicious!
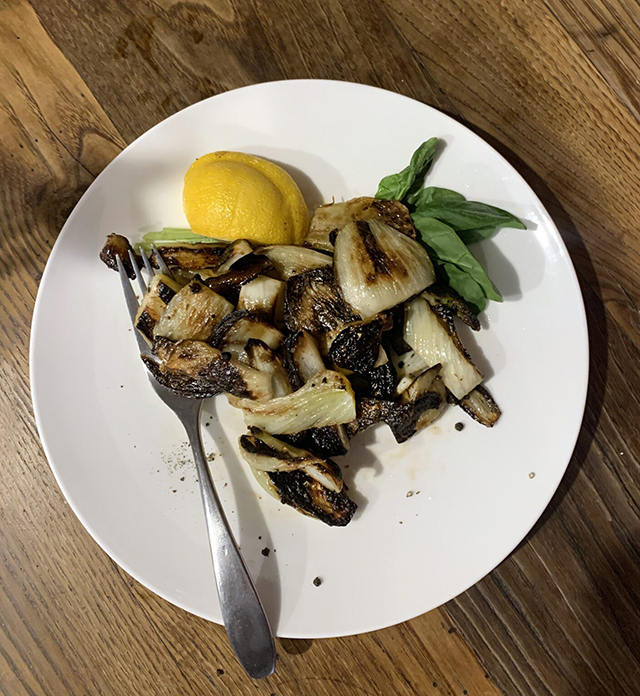
Kaori Caramelized Fennel
Ingredients:
2 bulbs fennel
3-4 tablespoons EVOO
1/2 lemon juiced
Coarse Salt, fresh ground pepper
Directions:
- With a sharp knife, cut the top and bottom from the fennel bulbs and then remove tough or bruised layers.
- Slice the bulbs in half and then remove the cores from the fennel. Then cut the fennel lengthwise into slices.
- Heat a large skillet over medium-high heat. When hot, add the olive oil and then the fennel slices. Spread the fennel out in the pan to encourage browning.
- Cook for 10-12 minutes, flipping the fennel slices every few minutes, until golden brown.
- Remove the fennel from the pan and drain off excess oil. Season with salt, pepper and lemon juice, to taste. Serve.
Note: the trick to caramelizing is a very pan. Be careful not to burn the oil or fennel. Avoid layering the fennel; keep all pieces flat on the pan. Do not cover and steam.
I was very tempted to add some garlic cloves, but I wanted to stay true to the recipe. And guess what? The garlic wasn’t needed. The flavor of the caramelized fennel is sweet with a hint of the anise flavor the vegetable is known for. Lemon is the key to brightening and adds a nice flavor contrast.
Follow me in the kitchen on Instagram: @theglorifiedtomato.
by Paula D.
on April 22, 2024 9:26 am in Art / DIY
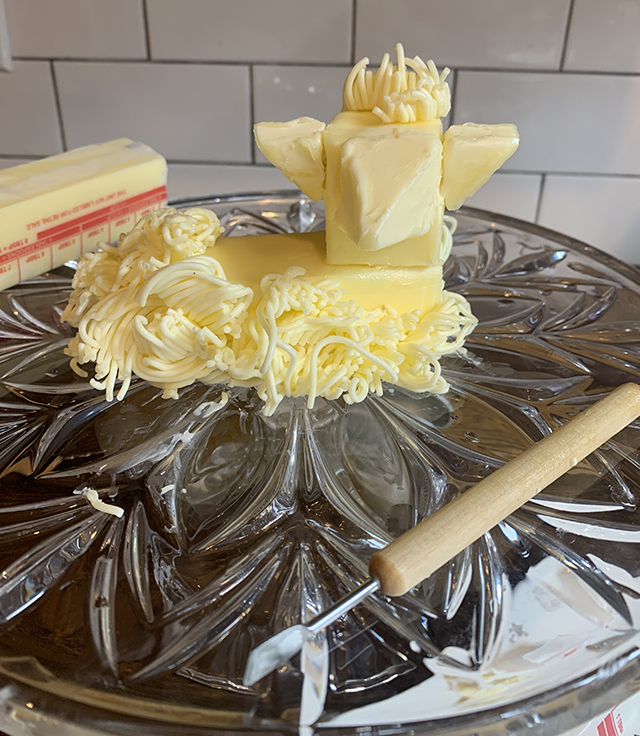
Knowing how passionate I am about my Butter Village refrigerator installation, my thoughtful Godson Jake, gifted me sculpting tools last Christmas. I’ve been eager to use them and now the time has come. I’m in the midst of sculpting buttered lambs — in preparation of Easter Sunday, which I host every year.
I’ve discovered that sculpting with butter requires a delicate touch and precision to shape the creamy medium effectively. The variety of tools has provided me with the opportunity to create interesting textures and details. The possibilities are almost overwhelming if it wasn’t so darn fun!
The tradition of sculpting a buttered lamb for Easter has its origins in Eastern European cultures, particularly among the Polish and Ukrainian communities. Butter, being abundant in these dairy-rich regions, became the medium for creating intricate lamb sculptures. The practice likely dates back centuries, with families sculpting butter into the shape of a lamb to adorn their Easter tables as a symbol of abundance, fertility, and the renewal of life associated with the spring season. More so, for Christians the lamb is laden with serious symbolism – representing Christ as the sacrificial Lamb of God. The red ribbon around the animal’s neck embodies the blood of Christ. The red flag – peace on earth.
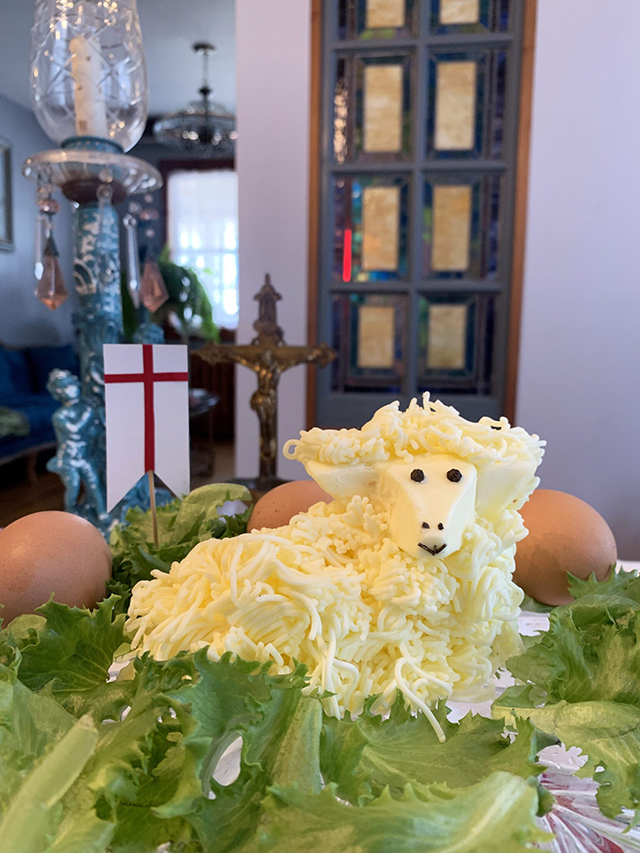
Behold, the Lamb of God who takes away the sins of the world.
Over time, sculpting a buttered lamb has evolved into an Easter tradition that has spread to various other cultures around the world. To such an extent that you will see this deeply religious symbol in the dairy section of Stop & Shop.
Are you ready to make your own buttered Lamb?
Materials:
- 2 ½ sticks of cold butter
- A butter knife
- Sculpting tools and toothpicks
- Garlic press
- Greens for display
- Whole peppercorn for eyes, red pepper for the ribbon.
- Thyme
- A working plate and a display plate
- Paper Towels
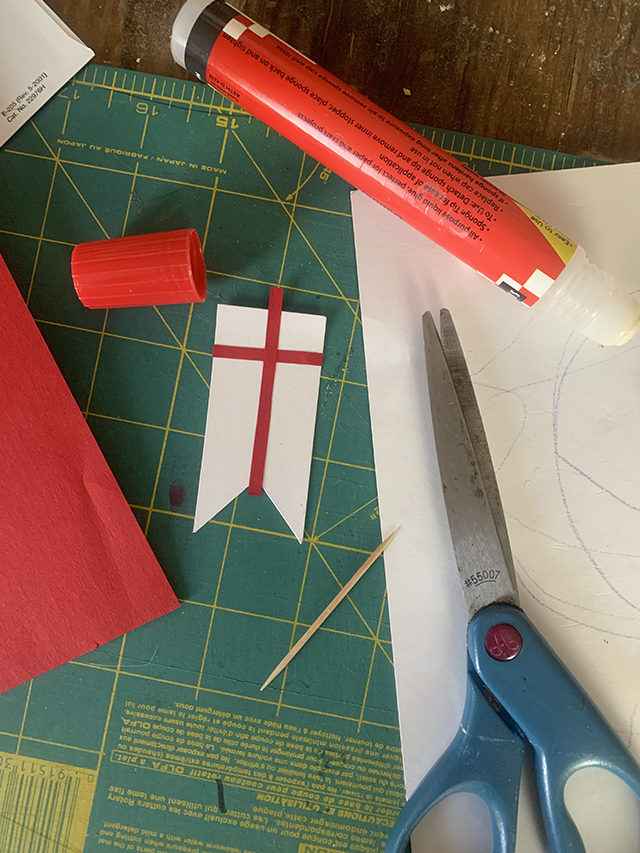
- White and red paper, or red marker, to make the flag (optional)
Directions:
- Wash your hands and have a clean surface to work on. You may consider wearing gloves to create your edible buttered lamb.
- Cut the butter stick removing one third. Then cut one quarter pad of butter off the one third piece. The larger block is the body. Place that on your finishing plate. Attached the head (one third piece) with a toothpick. Use the one quarter pad to sculpt a triangular face. The lambs head can look forward or to the side. Adere with a toothpick and use your fingers to mold the face onto the head.
- From the second stick of butter cut off a one quarter pad. Cut at an angle making two triangles, cut again in half diagonally. Those two pieces are the ears. With your hands, sculpt the ears onto the face.
- With the second block, cut small pieces and use the garlic press to squeeze out the curly wool. Use a butter knife to scrape off the curly shapes. Repeat the process until your lamb is covered up to the neck, add some “wool” on the top of the lambs head and back of the ears.
- Use two peppercorns for eyes. For the nose, opt for cracked peppercorn. Cut a small stem from a piece of thyme for the mouth. Use a long, thin piece of red pepper for the neck ribbon. Add greens to create a pasture around the lamb.
- Carefully cover with clear wrap and refrigerate until you’re ready to display The Lamb of God on Easter Sunday.
Click here for a helpful instructional video.
by Paula D.
on April 22, 2024 9:20 am in Animals / DIY
Can you hear the chirps? Can you smell the hint of spring? I can. The earth is stirring from its slumber.
Springtime in Rockaway and Jamaica Bay becomes a bustling hub for migrating birds, as these many species embark on their long journeys northward. Our coastal home offers a vital stopover point for birds traveling along the Atlantic Flyway, providing abundant food sources and habitats for resting and refueling. Birdwatchers flock to Rockaway to witness the spectacle of thousands of birds in transit, including the American oystercatcher, piping plover, and various species of terns and gulls. We are lucky to witness these beautiful birds foraging activities along our shorelines.
This activity is an excellent way to engage with your children while offering valuable learning opportunities about birds, recycling, and composting.
In the upcoming weeks, we’ll also be spotting smaller “backyard” friends such as songbirds like warblers, sparrows, finches and flycatchers, thrushes, even orioles! In my last column I suggested making a cute bagel bird feeder. Birds also enjoy snacking on berries and fruits, including oranges! This has sparked another idea for a feeder…
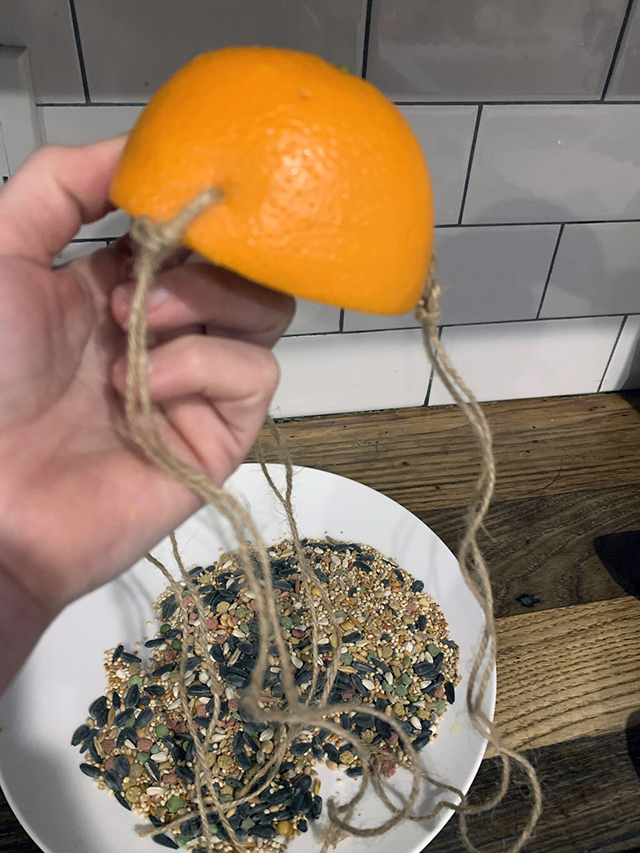
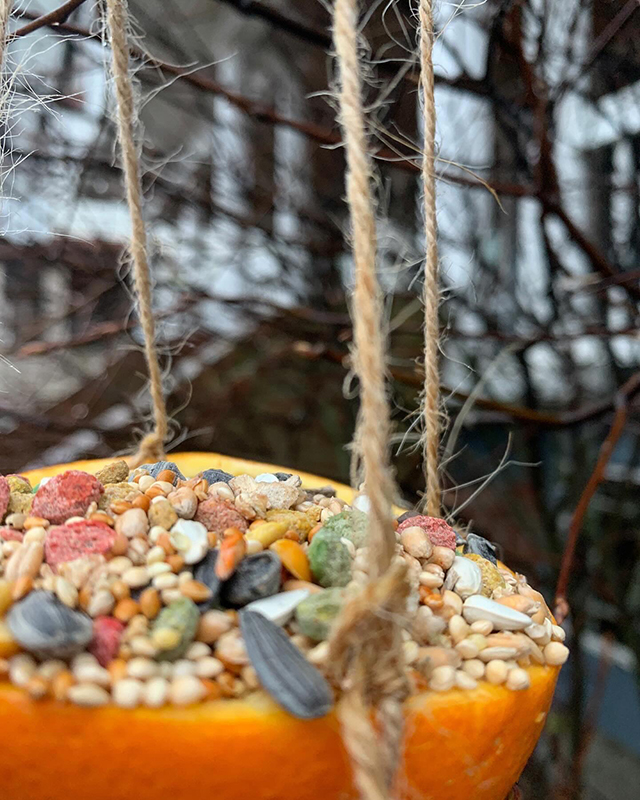
Orange Oasis Feeder
Supplies:
(Makes 2 bird feeders)
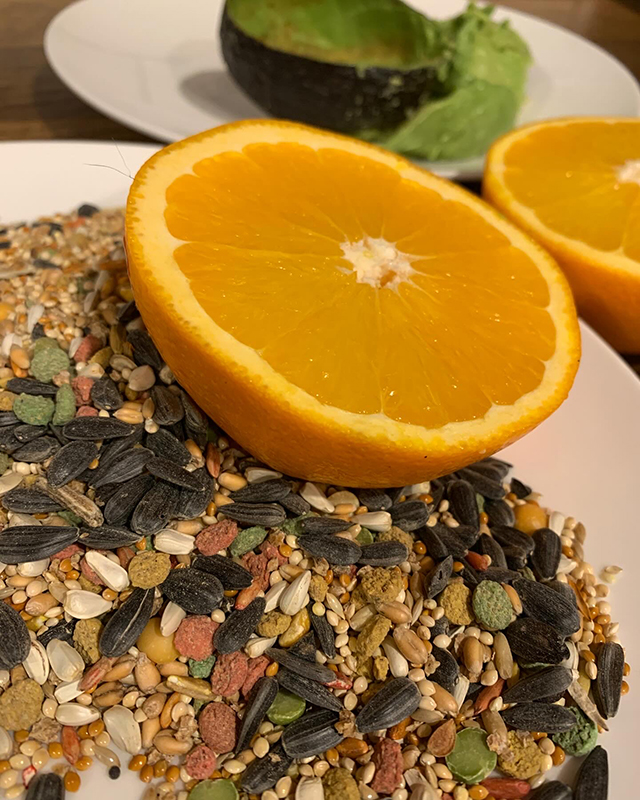
- 1 orange (any size works and a variety of sizes in one tree looks beautiful)
- Twine
- Bird seed (choose a mix specific for the types of birds you’d like to attract
- Knife and scissor
- Toothpick
Noe: Experiment with an avocado or other organic foods that have a sturdy vessel!
Directions: Cut the orange in half and carefully remove the pulp while keeping the rind intact. Cut the twine to your desired length. Use the toothpick to create a hole a quarter inch from the cut edge. Thread the twine through the hole using the toothpick. Loop or tie the string to secure it. Repeat this process three more times, ensuring equal spacing around the edge of the oranges.
Next… find a tree! Secure your feeder to a branch. Then, using a scooper, fill the orange cavity with bird feed and watch as the birds flock to the orange oasis you’ve created.
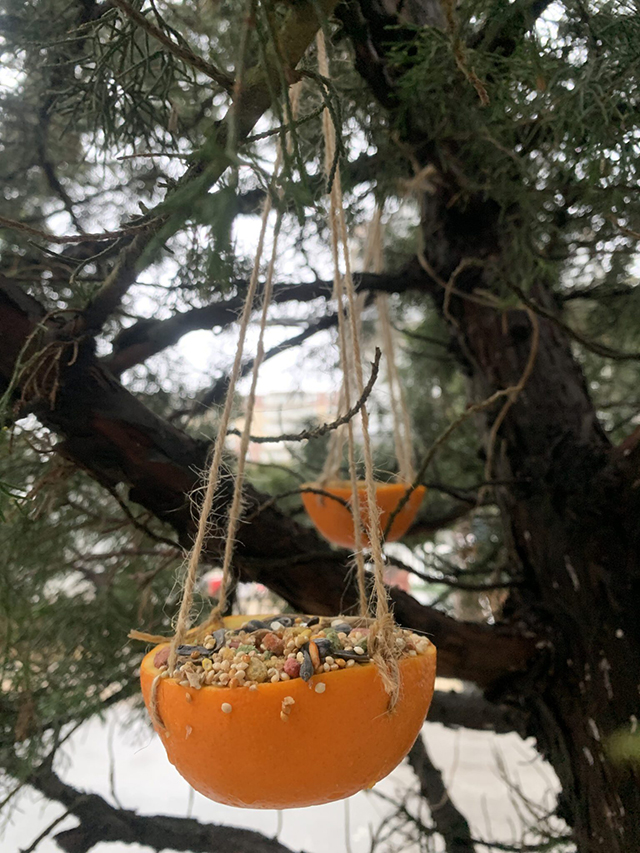
Not only beautiful and bright, this is an all-natural compostable bird feeder.
Near your feeder consider offering fresh water sources, such as a bird bath or shallow dish. This will help replenish birds’ energy reserves during their long journeys. By creating bird-friendly environments and practicing responsible bird feeding habits (no people food!) you will contribute to the conservation efforts aimed at supporting migratory bird populations and have fun doing so!
Follow my gardening escapades this season on IG – @theglorifiedtomato!
by Paula D.
on April 22, 2024 9:14 am in Art / DIY
I just returned from the Villa Roma. This is an old-school resort where mostly Italian people from Brooklyn and Lawng Islanders gather to eat mountains of food, gamble, generally indulge, and most importantly, spend time with la familia.
My Grandfather Ralph found the place and we had gone a few times when I was a tween. My sisters had the idea of going back, and we have reintroduced the tradition since my godson Jake was three years old. He’s turning 18 on March 23rd! My nieces, nephews, sisters, husbands, and parents adore the Villa Roma. What’s not to love….
Each day, the one and only Doc Holiday hands out the activity sheet, featuring jackpot bingo, bocce ball tournaments, and left-center-right dice. There’s also a gambling lounge with OTB, card tables, scratch-offs, and keno—it’s awesome! Our family’s favorite activity is the horse races, where the little kids move wooden horses on the forum stage while the adults (and kids) place bets. The pot can reach thousands of dollars. How does the VR get away with this? We all wonder, but no one asks (the code of silence).
You can learn pickleball with Doc, play cornhole, or win an indoor golf championship. I participated in the crafts, even though sometimes I was the only adult. We designed birdhouses, painted rocks, and made jellyfish.
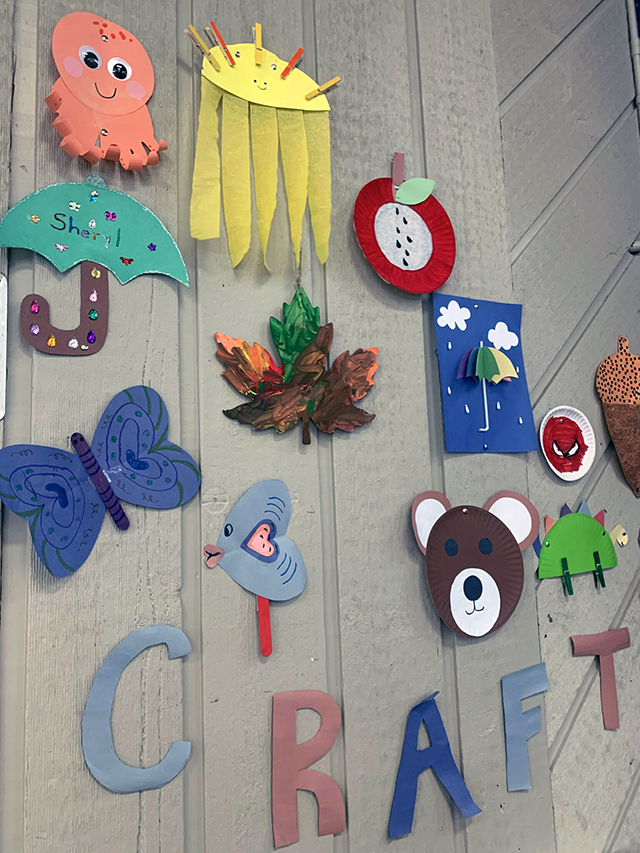
Craft creatures from the odds and ends around your home.
The evening activity list is plentiful, making it hard to choose. There’s movie night, a visit to Marty’s Lounge to see the tricks of Magic Tom, the world’s best magician. Sing at karaoke or get hypnotized by Mr. Hypno and… dance the night away to fist-pumping techno at DJ Black Jack Dance Party.
Go rogue, off Doc Holiday’s itinerary and visit the other buildings on the grounds. There’s rock wall climbing (I made it to the top!), hanging out at the bowling alley, and of course, there’s the ski mountain with a very hip vintage 70’s lounge.
Yup, it’s pretty much a Dirty Dancing vibe, with more kids.
Give a plain ol’ rock the rock star treatment.
I could talk endlessly about this special place, but what I really want to emphasize is crafting. While we’re in the midst of winter and eagerly awaiting spring, the Villa Roma reminded me that crafting is the perfect indoor activity. So if you can’t make it there, here are three ideas to inspire your next craft night with friends or with the family.
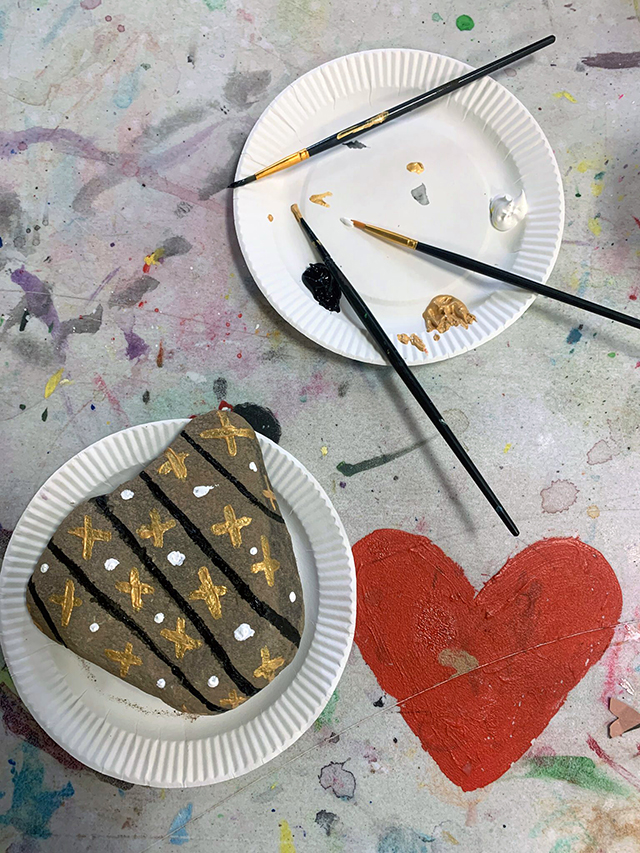
Paint a Rock: We’ve all painted shells, but what about rocks? During my brisk beach walks, I’ve noticed smaller versions of the large jetty rocks on the sand. Grab a few and break out the acrylic paint. Give it as a gift. Use scrap paper and Mod Podge to decorate the rocks. Make garden markers for your herbs and veg, and write: basil, tomatoes, thyme, etc. with a paint pen… you’ll be all set for the gardening season.
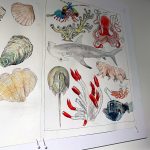
Craft Jellyfish: I’m a big fan of using recycled materials. Let the kids gather materials only found in your home: a paper plate, ribbon, napkins, the newspaper (ahem). You’ll be surprised by what ordinary materials you can transform into a cool craft. Cut and glue your pieces together to make a jellyfish or other sea creature.
Bird feeder Bagel: This is one of my favs. Use a stale bagel, and loop a string through the center. Cover your bagel with peanut butter and then roll it in a dish of bird seed. Hang it from a tree near your home, and the beautiful winter birds (and an occasional squirrel) will enjoy your gift. Full instructions here.