Baby Spiders in Tomato Cans!
I’m obsessed with propagating spider plants. My father gave me one when I moved into my first apartment 4 years ago and ever since I’ve been growing baby spider plants. A year into my propagation obsession I started giving them away for birthdays and housewarming gifts. I had/have so many I don’t know where to put them all! When I heard that the Historic Vander Ende-Onderdonk House was hosting a Flea Market & Community Yard Sale, I knew immediately I wanted to participate! Stop by our plant stand and say hello on Saturday, April 28th from 11am-4pm at the Onderdonk House, 1820 Flushing Avenue, 11385 (four blocks off the Jefferson stop on the L train).
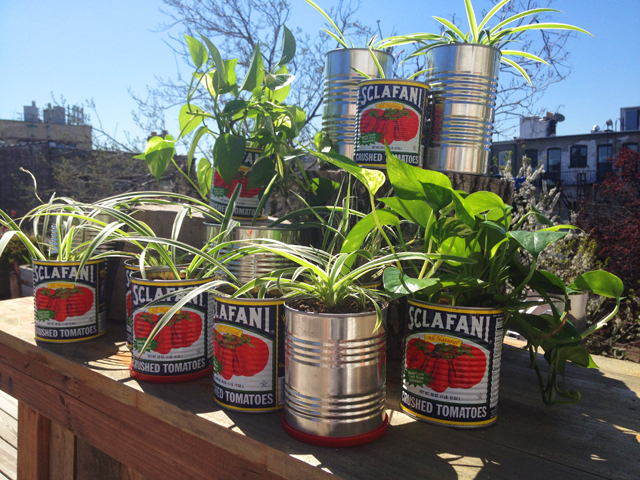
The Glorified Tomato spider plants will be appropriately enough, potted in Sclafani cans! They look absolutely adorable and more importantly they’re recycled, eco friendly planters! A while back I had the idea to use bean and sauce cans as planting containers. I’m constantly cooking and the cans are always around. Below is the step by step on how to make your own recycled planter. Plus what to expect at our plant sale!
1. Use your canned product. Wash thoroughly and save the container for when you’re ready to make the planter! Sclafani cans are special – the label is printed on the can itself! Moreover, the sauce is excellent and if you care, it’s gluten free and vegan friendly. Pictured right is the plant my father gave me – the great great grandmother spider mama plant!
2. Matt suggested drilling holes into the bottom of the cans for drainage. First use a nail to make a groove, then drill. If you don’t have experience using a drill, it can be difficult. Tip: drill slowly without applying much pressure. I will admit, I worked on the can pictured above and then I made Matt do the rest!! If you don’t want to drill, water moderately once a week – spider plants are hard to kill!
3. For safety, file sharp edges. You need a metal, round file. I was ready to use sand paper when Matt uncontrollably laughed and told me that wouldn’t work! I have limited experience with tools. Growing up as a Long Island Italian princess my father did everything for me!
4. Now the fun part! Shown above is the baby spider plant. Just clip it off with a scissor close to the root. The red arrow pictured right, is pointing to the root. This is the end you’ll put in the soil.
5. Fill the can with potting soil 3/4 of the way. Place the baby spider in the center and fill the remaining space with more soil. This is important – for the first week make sure you water often. The soil should be almost saturated. I use miracle grow immediately after I pot the plant (rooting hormone also works well).
For size variety I went to western beef where I bought chicken broth cans and gigantic cans of beans! Above are the plants a few days after planting. Their growing fast and looking fantastic.
We’re so excited to be participating at the Onderdonk House flea market, See yah there!


